When buying a paraglider, you want to ensure that it supports your size, flying style, and skill-level needs. Most importantly, it should be USHPA or EHPU certified, indicating that it meets the quality and security required before flying.
What Are the Parts of Paragliding?
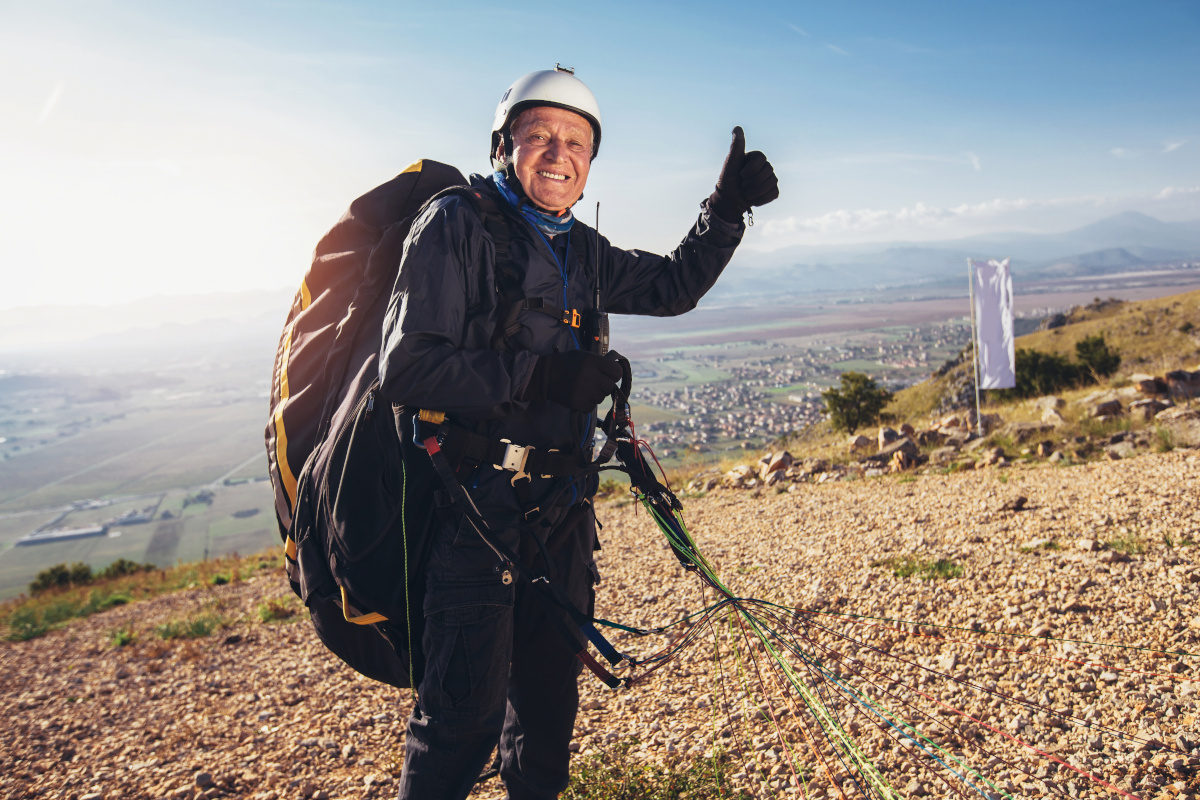
The three main parts of a paraglider are the wing, the harness, and the lines and risers. There are also other parts that relate to your security, such as a helmet, gloves, boots, and a reserve parachute. All of these are essential in paragliding.
Three main components of a paraglider:
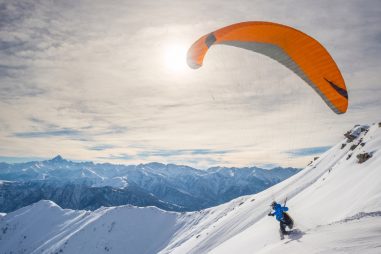
- Wing/Canopy: This is your wings. It has an arch shape designed to float in the air. The front part of the canopy is called the leading edge, where the air comes through the cell openings and inflates the wing. It is very durable and made of rip-resistant nylon.
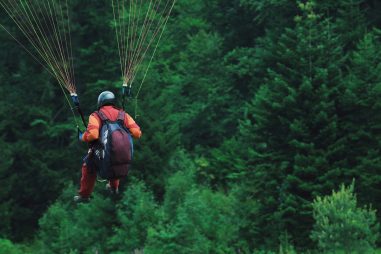
- Harness: The harness is where you are seated. It has body straps to protect you. It connects to the canopy through a series of lines and risers.
- Lines and Risers: The lines and risers help you control the speed and direction of your paraglider.
The paraglider needs constant maintenance. Therefore, you want to make it a habit to check your equipment before and after flying to prevent risks and lengthen its lifespan.
What Safety Equipment Do I Need In Paragliding?
You will need several pieces of equipment in paragliding to uphold safety. For instance, a reserve parachute, GPS and Variometer, a radio, and so forth. All of these gear will serve as your lifeline while in the air. They allow you to make decisions better, connect with other pilots, and be ready in an emergency.
Safety equipment in paragliding:
- Reserve Parachute: It’s usually located underneath the harness. It can be activated in an emergency when your glider is no longer functioning.
- GPS and Variometer: The GPS allows you to locate where you are and where you’re going. The latter measures your vertical speed, altitude, and air temperature. You can get them separately, or there is a newer version where you both have them in one piece of equipment.
- Radio: This will allow you to communicate with other pilots. It also receives information from the ground on matters of weather changes or an emergency.
- Compass: You can use this in areas where your GPS will not work well, such as in low visibility areas or during turbulence. This way, you will always know where you’re going.
- Helmet: This will protect your head during liftoff and landing. It’s best to get a helmet that protects your jaw and nose.
- Flight Suit: This will protect you from weather changes and support your airborne movement.
- Gloves: Because you will use your hands a lot to control your glider, you want to invest in gloves that can protect you from the cold.
- Boots: This will prevent the risk of hurting yourself during liftoff and especially in landing.
- Sunglasses: The sun can be bright and blind you in the air, so it’s best to have sunglasses with you to keep your visibility.
This list provides an additional layer of safety while flying. It should prepare you with all the gear you need to begin paragliding.
What Is a Paraglider Wing?
The paraglider wing has an elongated elliptical shape that is perfect for flying. It inflates when air passes through the cells in the front of the canopy or leading edge. It is durable, made of non-rip nylon, and connects to the harness through a series of lines and risers.
Parts of a paraglider wing:
- Leading Edge: Front of the glider where the air comes in through cells.
- Trailing Edge: The back part of the wing.
- Wing Tip: Also called an ear, is the outermost area of each semi-wing.
- Wing Span: Distance between the left and right-wing tips.
- Cells: They are divided by walls in a glider and prevent collapse via its inflatable capability.
The paraglider is your wings and will help you soar for a long time, coupled with your knowledge of weather conditions. However, it needs constant maintenance, and you must do so before and after flying.
How Does a Paraglider Wing Work?
A paraglider inflates when air enters the cell openings and obtains lift when it reaches a level of airspeed. Its arch shape is perfect for long-distance flying. It is best to run on a 45-degree angle for constant airflow into the canopy and acquire lift without too much work.
You can maximize your glider by knowing the types of air you can use to increase altitude and fly longer and farther. They include Thermals, Wave lift, and a Ridge lift.
How to Choose a Paraglider Wing
Your choice of paraglider wing will depend on your skill level and experience. It also differs in class and weight range. Your paraglider wing is an investment, and you want to choose a glider that you can use for a long time.
Tips for choosing your paraglider wing:
- Consider your level of experience. Evaluate where you are in terms of your skills to help narrow down your options.
- One concept of getting a paraglider wing is the weight. Usually, a heavier glider is for tandem flights with heftier weight.
- Another concept of getting a glider wing is the type of class. It could be either standard for first-time pilots, advanced for more experienced pilots, or competition for competitive flying.
- Do a test flight and see the quality of your takeoff and landing. Also, see if you’re comfortable while on air.
- Avoid buying a secondhand paraglider wing. You won’t know exactly how old it is, and that adds a potential risk to you when flying.
As a beginner, you’ll want to work with your instructor, mentor, or a more advanced pilot to help you choose the best glider for you. Though there are plenty of options in the market, ultimately, you want a paraglider that will be an asset to your skill set as a pilot.
How Much Does a Paraglider Wing Cost?
A paraglider wing can cost around $2500 to $4000. It depends on the quality, brand, and type of glider you wish to have. If you are considering buying a secondhand wing, the price is between $1200 to $2000. The bigger and more advanced the paraglider is, the higher the price.
Paragliding is an expensive sport but the equipment is durable enough to last anywhere between 3 to 6 flying seasons. It depends on how often you fly. So with consistent maintenance, it will last you many flying hours.
How Long Do Paraglider Wings Last?
Your paraglider wings will last between 200 to 300 hours of airtime, depending on how often you fly. You can expect general wear and tear from constant exposure to ultraviolet rays. There are several factors that may affect the quality of your glider. It’s part of your responsibility to check your equipment before and after flying.
Paraglider wings are durable and meant to last a long time. Taking good care of your glider lengthens its lifespan and gives you safety and comfort in the air.
How Many Hours Does a Paraglider Wing Last?
Your paraglider wing may last between 200 to 300 hours of flight time. It will depend on the number of times you use it and how you maintain it. Another factor is the quality of the wing before using it. For instance, secondhand gliders may not last as long as a new paraglider.
The wing is generally safe and rip-resistant because of its well-made fabric. Try your best to maintain your glider to extend its lifespan further.
How Many Years Does a Paraglider Wing Last?
Your paraglider wing may last you 3 to 6 flying seasons. Of course, this will vary on how well you use your glider as well as your level of maintenance. Several other factors that may affect its quality include environmental and mechanical influences.
The most common damage to a paraglider is torn fabric and damaged or broken lines. Bring maintenance equipment with you when flying to remedy any damage in your glider quickly.
How to Maintain a Paraglider
It’s part of your responsibility as a pilot to do a maintenance check on your paraglider to monitor quality. Two main factors that may affect the grade of your paraglider are environmental and mechanical issues. You can avoid some of them, while others naturally come, in general, because of usage.
Tips in maintaining your paraglider:
- Avoid extreme temperatures as they influence the fabric coating of your glider.
- Don’t stop your glider in wet areas or anywhere with moisture.
- Keep your glider off the ground when you’re not preparing for liftoff to prevent unnecessary friction.
- Clean all your equipment often. Remove dirt and insects stuck in your glider.
- Be mindful of the lines and risers.
- When landing, don’t let your wing fall on its leading edge.
- Fold the wing cell by cell without too much bending as it may damage the ribs.
- Bring a maintenance kit ready with you when flying to remedy any damage immediately.
- Be careful of the environment surrounding your takeoff and landing spots.
- Be gentle when cleaning or performing maintenance checks.
Acrobatic flying can also cause wear and tear on the glider because of high overloading. As a result, some deformation may not restore completely.
What Is a Single-Skin Paraglider?
As the name suggests, a single-skin paraglider only has the upper surface of a classic glider with a lower surface on the leading edge. It makes inflation very easy and the weight lighter. It may be different from a classic paraglider flying-wise, but it provides more safety during the liftoff phase.
Advantages of a single-skin paraglider:
- Resistance against collapse.
- Easy liftoff.
- Can tolerate beginner’s mistakes.
- Stable and mild the entire flight.
- Little wind is required to inflate the wing.
- Hike-friendly because of its lighter weight.
- Easy to fold and can fit a backpack.
- Best for beginners or those with little to no experience in paragliding.
A single-skin canopy may be more of a disadvantage in terms of thermal influences as it doesn’t have considerable effects and does not provide altitude or speed. However, it is a stable and calm flight that is best for beginners.
Are Single-Skin Paragliders Safe?
Yes, single-skin paragliders are safe. Because of its steady and controlled flight, it’s perfect for you if you have little to no experience in paragliding. They are also easy to fly.
Single-skin paragliders are safe, especially for takeoff, because it’s easier to obtain lift. In addition, its ability to support your weight happens faster than on a classic glider in the same area.
Single-Skin vs. Double-Skin Paraglider
A single-skin paraglider only has one surface, while a double-skin is a classic glider with both the top and lower surface. Your choice of a glider will depend on your skills and the experience you want to have while airborne. Each has its own strengths and weaknesses.
Single-skin paraglider
Pros:
- It has more solidity in the wing.
- You can pack it small because of the lesser use of fabric.
- Risers are simple and lightweight.
- Launching the paraglider is effortless.
- A tiny correction is needed when the glider is overhead.
- Flight is stable and easy to control.
- Low risk of collapse.
Cons:
- Limited in the wind.
- More bumps transmit in the wings.
- Thermal wings have little to no effect on them.
- Not a lot of dynamic flying as it is mostly stable and fixed.
Double-skin paraglider
Pros:
- It provides a good glide ratio, speed, and wind penetration.
- Perfect for thermals and rising air.
- Canopy will inform you if there are changes in the air.
- Great for more dynamic flying.
Cons:
- Heavier in weight.
- Not travel-friendly and takes up a lot of space.
- It takes a while to inflate and obtain lift.
- Susceptible to collapse.
Other than single- and double-skin paragliders, there are also hybrids available. It’s a combination of the two, offering the advantages of a single-surface glider with the characteristics of a classic wing.
Why Do You Need a Harness for Paragliding?
The harness acts as your protection when paragliding. It connects to the glider directly through a series of lines and risers and keeps you safe and comfortable with its body straps and carabiners. A harness also influences your overall control of the glider as it flies in the air.
Some harnesses have a backpack attached to them, so you don’t need to get a separate one. You will also find your reserve parachute underneath it, which provides protection in an emergency.
How Do I Choose a Paragliding Harness?
Choosing a paragliding harness will depend on your level of experience and skill. Your choice of harness will hugely affect your overall performance in paragliding. There are plenty of options in the market, so you’ll have to select one that gives you the most comfort and confidence while in the air.
Factors to consider in choosing a paragliding harness:
- Type of Harness: There are options based on your preference and experience. The basic one is a standard upright, while a pod and a specialist harness are for more advanced pilots.
- Size and Fitting: You should be able to fit in your harness securely while moving freely and comfortably.
- Overall Quality: The quality of stitching and webbing should be impeccable, or else you risk danger to yourself while in the air.
- Comfort and Maneuverability: You should be able to shift your weight without putting too much effort. Also, you should be able to tell when your canopy sends a message about a change in air movements.
- Reserve Parachute: This will again depend on your preference, but you should be able to easily access the parachute wherever it is in the harness in an emergency.
- Backpack: Most harnesses come with a bag, so you won’t need to have a separate one. It will come in handy when storing other items you’ll use while flying.
- Weight: Consider how heavy the harness will be as it contributes to the overall weight of your paraglider. It can also be helpful to have a lighter one when hiking up the mountains before flying.
- All-around protection: Most important of all, you must feel protected. Therefore, the harness must have an official certification that it is safe to use.
Try the harness of your choice before buying. You’ll want to adjust the shoulder, lumbar, and waist straps to get an overall feel of the equipment and make further changes to help you decide which harness is best for you.
Types of Paragliding Harness
There are three types of paragliding harness, the standard upright, the pod, and the specialist. They all differ based on your experience as a pilot. Your flight plan is also a factor because they all have their uniqueness and use based on where and how long you’ll be flying.
Types of paragliding harness:
- Standard Upright: The seat hugs your body while your legs are free. It is a perfect harness for beginners. It will help you hone your piloting skills and develop good flying habits.
- Pod: You will be in a reclined sitting position in this harness. It is best for long flights. It is for advanced pilots because takeoff is more complicated than usual.
- Specialist: This is for specialized paragliding. For instance, mountain paragliding, paramotoring, and speed flying.
Try to determine where you are in paragliding to help you select the type of harness to use. Whatever you choose, your harness must be able to protect, support, and provide comfort while in the air.
Airbag vs. Foam Paragliding Harness
In an emergency, a paragliding harness offers two safety features, airbag or foam protection. An airbag inflates in an aerodynamic shape to limit drag. On the other hand, foam protection absorbs impact to protect your spinal area. Here are some of the advantages of each of these safety features.
Airbag
Pros:
- Lighter in weight and easier to carry.
- It has more precise control of your glider.
- More aerodynamic.
Cons:
- It offers no further protection once the airbag has deflated.
- It may slip aside in the event of an off-center impact.
Foam Protection
Pros:
- It offers good overall protection because of its shape and size.
- Perfect for beginner pilots.
- It stays in place in the event of an impact.
Cons:
- Heavier and bulkier.
- It may be hard to pack and carry.
You want to choose a harness based on your flight expectations and experience level. For example, an airbag is more effective than a foam bag in a vertical fall but may slip aside if the impact is off-center. A foam bag stays in place and generally has a longer lifespan.
What Is a Reversible Paragliding Harness?
A reversible paragliding harness is best if you want more compact and lightweight equipment. It is excellent for traveling and can weigh under 3 kilograms (6 pounds). It is perfect if you like “hike and fly” paragliding.
It offers only airbag back protection, so it is best for a more experienced pilot. However, if you are a beginner pilot, you’ll want to get the harness with foam protection.
How Much Does a Paragliding Harness Cost?
A paragliding harness is somewhere around the region of $500 to $2000. The cost will depend on the quality and the type of harness. The more advanced it is, the higher the price. Because it is costly, you want to make sure that you’re choosing the one that is best for you and your skill level.
Some paragliders come with a harness with them. If you’re buying them together, ensure that the glider and harness suit your experience level and flight style.
How Long Does a Paragliding Harness Last?
A paragliding harness may last several years if given proper care. They have no UV light exposure and experience no abrasion because they are fully covered compared to the paraglider. Although this is the case, it is part of your responsibility as a pilot to perform regular maintenance checks as a form of security before and after flying.
Part of maintaining your harness is examining the durability of the carabiners, webbing, and stitches of the straps. They are most important and what keeps you safe while seated.
How to Maintain Your Paragliding Harness?
Treating your paragliding harness with care will help maintain its quality for years. As a pilot, you want to ensure never to begin liftoff without a complete equipment check, which includes your harness. Try to build a habit of checking them regularly to lower the risk of an emergency.
Tips for maintaining a paragliding harness:
- Avoid storing this while damp.
- Frequently check for damage where friction and abrasion may occur.
- Examine the carabiners, webbing, stitches, and overall durability of the straps.
- Avoid leaving it on the ground unattended.
- Practice a daily equipment inspection before and after flying.
- Have a maintenance kit ready with you when flying.
The harness will last you a long time, but parts of it, for instance, the carabiners, have a manufacturer’s recommendation on when to replace them. It is always wise to follow this to avoid potential danger while airborne.
What Instruments Are Used in Paragliding?
Some instruments used in paragliding are a GPS, a variometer, a radio, etc. These paragliding equipment help support you and act as another level of security while you are in the air. In addition, they will notify you of weather changes and help you make better and more informed decisions.
Paragliding instruments:
- GPS: This will help you know where you are and where to go. It is essential in paragliding competitions.
- Variometer: This instrument helps to locate thermals to gain altitude and travel farther distances.
- Radio: You need this to communicate with other pilots and receive information about weather changes or air traffic control.
- Compass: There are some areas where your GPS may not work, so having a compass with you is an advantage. It will help you figure out where you are and where to go.
Having these paragliding instruments with you will help you maximize your flight experience. They are available as your resource to make informed decisions and be able to govern yourself in the air.
Types of Variometer in Paragliding
There are two types of variometer in paragliding, the first is called alti-vario, and the second is alti-vario-GPS combo. They both share an important concept, measure your climb and descent rate to maximize your flight time.
Types of variometer:
- Alti-vario: Features a pressure sensor and altitude pressure calculation.
- Alti-vario-GPS combo: Features the GPS, so you know where your location is and at the same time know your climb and descent rate.
When choosing a variometer, you want to look at what is easy to use for you. Try to determine the features and functionalities of the instrument and see if they can support your current piloting skills.
What Is a Paragliding Speed Bar?
A paragliding speed bar helps you increase speed. What it does is when you push on the speed bar with your foot, it pulls down on the front risers, which then accelerates the wing, increasing your speed and sink rate. As a result, it helps improve your safety and stability in windy conditions.
Advantages of having a speed bar:
- It is perfect for long-distance flying and paragliding competitions.
- It helps you have more control in difficult flying situations, such as strong winds.
- It can help in the rain and when you slow down to almost zero forward airspeed.
- Helpful when entering a thermal.
If you have more experience as a pilot, you’ll want to consider adding a speed bar to your glider for more dynamic flying. It’s not required but provides a whole different perspective when paragliding.
How Does a Paraglider Speed Bar Work?
When pressing a speed bar with your foot, the line that attaches it to the glider pulls down on the front risers, which causes you to accelerate and reduces the sink rate. It is perfect for getting out of gusts of wind safely. It is also great for cross-country paragliding.
Having a speed bar in paragliding is not mandated, but it is another way of improving your flying techniques. However, it can be a risk to you if used the wrong way.
Is a Paragliding Speed Bar Safe?
The answer is yes, the paragliding speed bar is safe. It is additional equipment you can add to your paraglider to get you out of difficult situations where there are slow or strong winds. However, as in all cases, the speed bar may also pose a risk if incorrectly used.
Risks of using a speed bar:
- Brummel Hook Failure: The hook is tolerant to damage, so ensure a preflight check.
- Attaching the Speed Bar: Avoid doing it the first time by getting an experienced pilot to teach you how to do it.
- Trim Setting: Avoid using the speed bar if the wing is in the trim setting while in slow mode.
- Loss of Altitude: You lose lift when you apply the speed bar, so ensure that you have plenty of height below you.
- Wing Collapse: Keep in mind that you may be susceptible to collapse when you feel turbulence when using the speed bar.
You may find using a speed bar a little intimidating, but it gives a different perspective on flying. However, use a speed bar only in cases where you expect weather conditions to be rough.
How Do You Set a Paragliding Speed Bar?
You can install a paragliding bar to have a more dynamic flying experience. It is also best if you plan to do long-distance paragliding to help cover distance when the wind is slow. Setting up a paragliding speed bar is easy.
Setting the paragliding speed bar:
- Remove the speed bar string on the Brummel hook and pass it through speed pulleys.
- Put the line on the rubber band, then into the main hole, and finally on the speed pulley close to your side.
- Avoid catching cables of the harness when putting the speed bar string through.
- Put the Brummel hook back on the line, from the back of the big hole to the small hole.
- Knot it tightly.
When installing the speed bar, you want to ensure you don’t tug the harness lines to prevent unnecessary damage. Then, you can adjust it as you feel comfortable.
How Do You Use a Paraglider Speed Bar?
Using a paraglider speed bar is straightforward and direct to the point. Basically, you accelerate faster when pushing down on the speed bar. Although this is the case, determining the timing is crucial to avoid the risk of collapse.
Steps to using a paraglider speed bar:
- Position your foot on the speed bar.
- Raise your hands to be ready for turns.
- Press on the speed bar gently.
- You should feel the wing go faster.
- Move towards the direction you wish to go by pulling on one of the lines.
Installing a speed bar for the sole purpose of flying is inadvisable. It can only give 5 to 10 kph (3 to 6 mph) wind speed. A speed bar is best when you expect weather conditions to be hard to manage.
How Do You Adjust a Paraglider Speed Bar?
You can get the full potential of your paraglider speed bar and fly more efficiently by adjusting this correctly on your glider. While on the ground, you can sit on your harness and get a feel of the speed bar to see what adjustments are needed. You can get another person to help you if you prefer that.
Steps in adjusting a paraglider speed bar:
- Start modifying the speed bar by loosening the string on the closed loop system.
- Pull the sister clip through to release the speed bar line.
- Adjust your knot as necessary.
- Pull it back through the hook from the big to the small hole.
- Put the clip back to secure.
Adjusting the speed bar is essential so you can get maximum efficiency while you’re in the air. Then, you can continue to experiment around before launching.
How Much Does a Paraglider Setup Cost?
A paraglider setup can cost between $2500 to $4000. This price varies on the quality of equipment. For example, a top-range glider can cost higher, whereas a secondhand glider is considerably cheaper. It does not include the cost of getting additional equipment necessary for paragliding, as well as your training.
Additional paragliding costs:
- Training: Paragliding training is required and can cost you around $1000.
- Reserve parachute: This will serve as your second lifeline in an emergency. It costs around $500 to $1500.
- Helmet: This will keep your head protected when launching and landing. The price is between $110 to $250.
- Gloves: These will keep your hands warm in cold-air conditions. The average price for gloves is around $50 to $100.
- Boots: A good pair of paragliding boots will support you in takeoff and landing. The usual cost is between $200 to $400.
- Radio: This will be your way of communicating with other pilots and air control personnel. The average price is around $170.
- GPS/Variometer: These instruments will help measure your altitude and inform you where you are. The average price for these is between $250 to $500.
Paragliding is costly, but all the knowledge and skill you gain are worth it. Not to mention all these equipment and instruments will last a long time.
How Big Is a Paraglider?
The size of a paraglider varies, but on average, it has an area of 20 to 35 square meters (220 to 380 square feet) with a width of 8 to 12 meters (26 to 39 feet). The other key difference of each paraglider is their aspect ratio. The higher the aspect ratio, the higher the speed, hence perfect for competitions.
When choosing a paraglider, consider the projected and actual wingspan. It refers to the distance between each endpoint of the wing in a fully inflated, arched shape. Doing this will give you an idea of its gliding ability.
How Much Does Paragliding Gear Weigh?
The weight of paragliding gear varies on the type. For instance, on average, small paragliding gear with a single passenger is around 75 kilograms (165 pounds). On the other hand, if you’re using tandem-paragliding gear, the weight is definitely in the upper class, around 110 to 130 kilograms (220 to 260 pounds) for each passenger.
Weight impacts your overall level of control, safety, and paragliding experience. The size of your glider affects your speed and sink rate. Smaller gliders get the best sink rate with little airspeed, whereas larger gliders get the top speed with a reduced sink rate.
Is There a Weight Limit In Paragliding?
Yes, there is a weight limit in paragliding. It is because the overall weight of your glider affects your performance, maneuverability, and flying experience.
Here are factors that may pose a risk if you exceed the weight limit.
- Wind: It will be harder to fly if you are close to or have exceeded the weight limit, especially if the wind is not particularly strong. It can also be dangerous when there are strong winds.
- Launching: Takeoff is challenging because of the extra weight and the lift required.
- Landing: Higher chance of crash landing as speed is harder to control.
- During an Emergency: Unable to control the glider well in a moment of crisis.
- Collapse: A sudden change in weather may make it hard for you to control your glider and result in deflation.
Just as exceeding the weight limit is dangerous, so is being too light. You want to have a well-distributed moderate weight to produce better stability.
How Are Paragliders Made?
The paraglider is an inflatable wing designed with an arch shape to sustain flight. The glider is composed of a rip-resistant, durable, and synthetic fabric, like nylon. It has two layers, the upper and lower surface, sewn together to form separate cell walls. The leading edge has cell openings that trap air to inflate the glider.
Attached to the lower surface of the glider is a series of risers and lines. These connect to the harness to allow weight distribution and control of the wing.
What Fabric Are Paragliders Made of?
The paraglider is composed of synthetic fabric that is well-reinforced against tearing. Each part of the wing has a different fabric thickness and is mechanically woven and examined carefully with the highest quality control. Also, it has a special coating that protects it against UV rays and lessens air tightness.
The fabric of the glider reduces quality over time because of use, constant exposure to the sun, and friction from launch and landing. With proper care, the lifespan of the glider is around 200 to 300 hours of flight time.
Which Fiber Is Used for Paragliding?
The synthetic fabric used in paragliding is either Gelvenor or Skytex. These are both trusted fabric-engineering companies that provide the highest quality industrial fiber, perfect for high-performance outdoor sports.
Only the highest quality fabric is permitted to construct the wing because it serves as your lifeline in the air. So, different fabric thickness applies to each glider part for overall suspension construction quality.
Which Material Is Better for Paragliding?
Different materials and properties apply to each glider part to achieve top-range suspension construction. For instance, the common materials used to build the lines and risers are Polyester, Aramid, Kevlar, and Dyneema. Even a manufacturer considers the thickness of the lines to ensure you and the glider are secure and supported.
Manufacturers constantly innovate the materials used to construct a paraglider and harness. They strive to meet your needs to help maximize your paragliding.
Where Are Paragliders Manufactured?
These factories vary in location based on the brand of your paraglider, for instance, in Asia and Europe. Countries such as Vietnam, Sri Lanka, China, the Czech Republic, France, Hungary, and Poland are the most common paraglider manufacturers. Sky Sports International, located in Sri Lanka, is the largest and most advanced production plant for paragliders.
An affiliated organization will examine all gliders and provide certification when it meets all the criteria required to allow them to fly. Avoid buying a glider that has no credentials from an allied institution.
What Is the Lifespan of a Paraglider?
The average lifespan of a paraglider is 200 to 300 hours or 3 to 6 flying seasons. It will depend on a number of factors, such as environmental and mechanical causes. With regular maintenance and proper care, your glider can last a long time.
Prolong the lifespan of your paraglider by:
- Repairing any damage immediately.
- Storing in a well-ventilated area, away from any abrasive objects.
- Cleaning the glider regularly and with care.
- Folding the wing cell by cell, avoiding the ribs.
- Clearing away from any debris when launching and landing.
- Performing an equipment check before and after flying.
- Replacing any equipment as necessary.
General wear and tear on the fabric of the paraglider begin when constantly exposed to the sun and hitting abrasive objects. The lines and risers generally last longer than the glider, except for the carabiners and hooks.
How Many Hours Do Paragliders Last?
Your paraglider has 200 to 300 hours of flying life. It may vary based on how often you use your paraglider. Common causes that decrease the life of your glider are low maintenance, constant exposure to sunlight, and friction from takeoff and landing.
If you think maintenance takes up a lot of your time, think of the money you invested in it and the extra cost it may incur if it doesn’t receive proper care. In contrast, a well-maintained paraglider will be a flying companion to you for a long time.
How Many Years Does a Paraglider Last?
A paraglider will typically last 2 to 4 years. It obviously depends strongly on the use and frequency of maintenance. Deterioration begins from sun exposure that limits the useful lifetime of your glider.
If you consider buying a secondhand glider, speak with the previous owner and understand how long and frequent the wing has been used to know how much life is left.
What to Do With an Old Paraglider
Your old paraglider can have a second life by donating it to organizations that upcycle the glider and turn it into clothes, kites, or anything that is useful to the community. This way, you can keep a large amount of synthetic fabric out of landfills. You also contribute by raising awareness and marketing paragliding.
Some organizations cover the cost involved in shipping your equipment. It is a wholesome way of contributing to the health, education, and overall general living condition of communities in need of them.
What Do You Look for in a Paraglider?
Perhaps, the most crucial thing to look for in a paraglider is the certification from an affiliated USHPA or EHPU organization. It indicates that it is top quality and meets all the criteria required to keep you safe and secured while in the air. Avoid buying new paragliders from resellers or those without certification.
You also want to look for a paraglider that fits your knowledge, skill, and experience. As much as possible, consider investing in a new paraglider instead of a secondhand one to ensure equipment quality.
How Do I Choose a Paraglider?
You need to look into several factors when choosing a paraglider. For instance, your skill level, type of glider, size, and overall performance. There are several options in the market, and you want to select one that best fits your needs.
Points to consider in choosing a paraglider:
- Size: Paragliders vary in size and weight. You want to choose a glider based on your weight. Lighter gliders have a better sink rate, while heavier ones have better speed.
- Type of wing: If you are a beginner, consider choosing the standard glider with a lower and upper surface to help hone your skills.
- Flying style: Your glider may depend on the flying technique you want to achieve, for instance, hike-and-fly, acrobatic, and cross-country.
The most crucial point of all is determining your experience level. This way, you’ll have a starting point and a better idea of what’s fit for you.
What Size Paraglider Do I Need?
The size of the paraglider will depend on your weight and type of flying. For instance, a large wing is best for covering long-distance flights. On the other hand, a tandem paraglider is bulkier and built to sustain heavier weight.
The size of your paraglider ultimately affects your speed and flight time. Also, paragliding has a weight limit to avoid the risk of collapse or any accident.
How Do You Size a Paraglider?
You can determine the weight and size of your glider, including the equipment, by wearing and holding all pieces of equipment and weighing yourself. You can then subtract your actual weight and add 30 to 45 pounds, an average weight of a paraglider. Adding back your actual weight helps you determine your “suspension weight” in the air.
Your suspension weight must be below the paragliding weight limit to allow flying. Otherwise, you pose a risk to other gliders and to yourself because of a potential accident.
What Is the Smallest Paraglider?
The smallest paraglider is the TONKA2 XXS. It weighs 1.8 kilograms (3.9 pounds), with a projected area of 11.8 square meters (127 square feet), and is one of the lightest LTF/EN-approved paragliders. Also, it is travel friendly and easy to launch.
This paraglider is for advanced pilots who like to hike-and-fly and para-alpinist. It has a dynamic wing, glides exceptionally well, and is fast.
How Much Does It Cost to Buy a Paraglider?
The average cost of a paraglider is around $2500 to $4000. It will depend on the type of glider and the quality. A complete equipment gear can cost between $3000 to $6000. Some paragliders already come with a harness, so you won’t need to buy these separately. A top-range paraglider can be more costly than standard ones.
You have an option to rent a paraglider while you are in training. However, training with your own equipment will ease the adjustment period and focus on honing your skills.
How Much Is a Good Paraglider?
The price of a standard paraglider is around $2000 to $4000. Thus, it is suitable if you are a beginner or just starting in paragliding. Once you become more experienced, you can upgrade your equipment, which usually has a higher cost than a standard one.
A standard paraglider is USHPA or EHPU certified. It should also fit your experience level and flying needs.
What Is the Best Paragliding Brand?
There are a lot of excellent brands to choose from based on your flying level and style. Some of the most famous brands are Ozone, Gin, Niviuk, and BGD. These brands have a variety of ranges, from beginner cross-country, competition, lightweight, acro paragliding, tandem, and more.
The best paragliding brand is one with certification from either USHPA or EHPU, stating that all their glider meets the quality and safety criteria required before flying them. So, when choosing a glider, check their qualifications to know if they are credible.
Which Is the Best Paraglider?
The best paraglider is the one that fits all your needs, for example, your size, flying style, and skill level. There is a range of options available in the market, but once you determine your requirements, you can narrow them down easier and select the perfect fit.
Best paraglider for each flying style:
- Hike-And-Fly: The Yeti 5 from the brand Gin has a light wing suitable for a hike ‘n fly and mountain adventures.
- Cross-Country: The Avid, again from the brand Gin, is a well-rounded paraglider with excellent climbing ability, pitch stability, and top-notched glide performance.
- Speed: Rapido 3 from the brand Ozone delivers significantly improved speed and power while maintaining stability and comfort.
- Acro Paragliding: The N-Gravity 5 from the brand Niviuk has an energetic wing created explicitly for acro pilots. It delivers easy takeoff and impeccable control.
- Tandem: The Magnum 3 from the brand Ozone is perfect for professional tandem pilots. The comfort, ease of launch and landing, and durability make it one of the best gliders for this specific flying style.
- Lightweight: The IOTA DLS from the brand Advance offers high pitch stability and is light and durable, weighing 3.9 kilograms (8.59 pounds).
- Competition: The Icepeak X-One from the brand Niviuk offers increased top speed, exceptional glide in all conditions, and efficient and more controlled steering.
The best paraglider for you focuses on your flying technique, comfort, and level of knowledge and experience. Paragliders have a different level rating, with an EN-A for beginners.
What Is the Best Paraglider for a Beginner?
The best paraglider for a beginner is one you can trust in the air and allow you to fly in comfort. Also, they should be stable, durable, and capable of providing support to hone your skills as a pilot. Here is a breakdown of each of these paragliders for beginners like you.
Best paraglider for beginners:
- Bolero 7 from the brand Gin: This is great for honing flying skills and practicing thermals. It presents dynamic, agile, easy takeoff, and less prone to tangles.
- Koyot 4 from the brand Niviuk: This is intuitive, stable, and easy to fly, with an aspect ratio of 4.75.
- Buzz Z6 from the brand Ozone: This is perfect for adventurous beginners. It offers a lighter sail, improved efficiency, and more agile control.
- Magic from the brand BGD: Perfect for training and progressing with its good pitch stability and reaction to thermals.
- Alpha 7 Wing from the brand Advance: Made with the latest technology, perfect for learning and sharpening skills afterward. Features hybrid risers equipped with trimmers that allow for balance and speed control.
Remember to choose a paraglider within your skill level and a size equal to your weight. Also, refrain from getting secondhand paragliders to ensure equipment quality.
How Much Is a Beginner Paraglider?
A beginner paraglider will cost around $2000 to $4000. It relies on the overall quality of the equipment. There are options available in the market that are perfect for beginners, and you’ll want to decide based on your level of expertise.
A beginner paraglider should be USHPA or EHPU certified. It should also allow for stable flying, smooth gliding, and space to hone your skills.
Can You Rent Paragliders?
Yes, you can rent paragliders. Some institutions require proof of USHPA P2 rating/certification. It is not always the case in all paragliding sites, and most demand that you have your own equipment. Check with the location beforehand if you have plans to rent a piece of equipment.
If you are a beginner, there are paragliding schools that rent out gliders. However, it’s always best to have your own equipment so you can make adjustments, and ease of learning is smooth.
How Much Does It Cost to Rent a Paraglider?
The average price of renting a paraglider is around $200 and $700 for one week. You are usually required to pay a deposit that they will use if there is damage to the equipment. Prepare to bring proof that you can paraglide on your own, as it is a standard requirement.
It’s best to call ahead and see if the paragliding site offers rental services. Some require approval and are only allowed in unique circumstances. Some also mandate a USHPA or EHPU membership, so check that out too.
What Should I Wear When Paragliding?
Wear clothes that can protect you from strong and cold winds. It may sound surprising, but winds can be chilling even in the summer. There is no strict regulation about what you wear, but you may want to skip on shorts and sleeveless. Instead, a one-piece and two-piece flight suit or layers of ordinary clothing would be sufficient.
Additional gear or clothing to wear when paragliding:
- Helmet: This will keep your head protected at all times. You want to select a helmet that secures your nose and jaw.
- Gloves: This will keep your fingers from freezing in harsh conditions.
- Footwear: Getting a good pair of shoes will help keep your feet protected when launching and landing.
A good layer of clothing, suitable footwear, and gloves would bring comfort in nippy wind conditions. If you plan to bring a camera with you, it has to be in a stable place and should not affect your glider.
How Much Does It Cost to Get Started in Paragliding?
A whole paragliding set can cost you around $3000 to $6000. It does not include the training and certification required, which has an average cost of $1000. Paragliding may be expensive, but the equipment and the knowledge you gain from the sport are long-lasting.
Once you have all the gear you need, there really isn’t anything else to spend on other than maintenance and if you choose to upgrade your glider. It is why the cost makes it worth it considering its long lifespan.
How to Buy a Paraglider
Before buying a paraglider, you want to have an instructor, a mentor, or an expert with you to help. It should meet all your needs founded on your skill, knowledge, and flying experience. Also, the paraglider should be able to support you as you hone your abilities as a pilot.
The instructor from your training school will usually have recommendations for beginners. You can also join a paragliding club to meet with other pilots and receive advice.
Where to Buy a Paraglider
You can buy a paraglider by going to the store directly or through the internet. The best choice is always the first one. You want to do this with an expert so they can advise and help you select which is best for you. The latter can be difficult because you won’t see the equipment until you buy them.
You always want to inspect the paraglider for quality and test it to see if it is the best fit for you. As a first-time buyer, you should always have an expert with you.
What to Do After Getting the Paraglider
Once you have a paraglider, you should prepare to get certified as a P2 pilot to fly by yourself. Once you have this, you are ready to hone your skills until you’re prepared to upgrade and move into more challenging, dynamic flying. After that, you are free to explore sites that are within your level.
You are also considered responsible for yourself and expected to follow the regulations set by the FAA. You’ll want to join a paragliding club to get a mentor and to fly with friends.