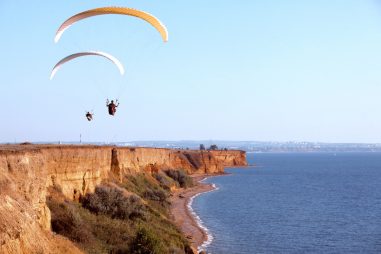
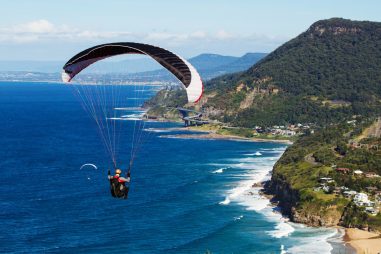
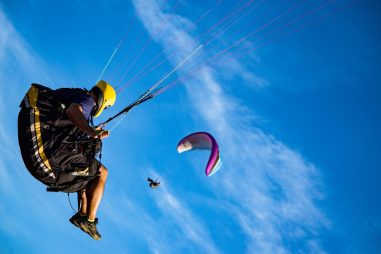
In paragliding, having astute judgment is a skill required when performing various maneuvers as there are always certain risks involved. In addition, being well-educated in weather conditions, drafts, and currents is also advantageous in optimizing your overall flight experience.
How Do You Steer a Paraglider?
Knowledge of the weather coupled with practice is required when steering a paraglider correctly. In addition, the shape of the wing and the behavior of your paraglider will change according to your control. Here are the principal factors to consider when steering your paraglider.
- The brakes: The way you hold the brakes will affect how fast or slow your paraglider will go when steering or turning. You want to avoid stalling the wing and spinning around when turning by having the maximum travel on brake lines.
- The speed bar: It can improve your safety in windy conditions but may also be risky if incorrectly used. As the name says, the speed bar helps you speed up. Be knowledgeable of wind conditions to get the best glide experience.
- Weight shifting: The way you shift your weight is also a contributing factor when steering your paraglider. It adds an extra layer of control when you have both your hands busy navigating the paraglider.
Brakes are a necessary part of your paraglider as it helps adjust your speed and shift weight. The brakes connect to the wing, which will then change its shape.
How Does a Paraglider Turn?
It is easy to turn a paraglider, but it takes plenty of time and practice to do so perfectly and with finesse. Remember that when pulling both controls, the glider flies slower. Conversely, when you release the pressure on both, it makes your glider go faster.
- Place your hands through the control hoops.
- To turn right, pull on the right-hand control and release pressure on the left.
- If you’d like to turn left, release pressure on the right and tug on the left control.
- Briskly or aggressively yanking on the hand controls might cause you to spin or the wing to fold. Turning accurately and flawlessly will take practice.
Always have both your hands on the control hoops for safety. You’ll need to turn your paraglider when you want to reach a higher altitude, either through a technique called coring or ridge soaring.
How to Do Wingovers in Paragliding
Wingover is a series of linked turns that slowly increase the height of the swing. It is the first technique you’ll need to master if you want to enter the world of acro paragliding. The key to a perfect Wingover requires perfect timing of weight shifting and braking. The harness position is another valuable factor. Like other techniques, it requires practice and supervision.
Steps to Do a Wingover:
- Begin by opening the chest strap of your harness as much as possible for a more sensible weight shifting.
- When in the air, start a fast turn to the right by pulling the right brake and shifting your weight in the same direction.
- Before you start to dive, release the brake, and shift your weight to the left, pulling the left brake to the lowest point.
- You will notice that the glider rolls to the other side, and you swing up with the wing in front of you.
- Press on both brakes when you reach the highest point. Doing this will prevent a collapse on the upper side of the wing.
- As soon as you dive, release the brakes, and shift your weight to the right, pulling the brakes at the lowest point.
- Press on both brakes again when you reach the highest point.
- Do this as you swing up higher and higher.
- To exit, withdraw the remaining energy gradually.
- Reduce the amplitude by lessening weight shifting and brake input until you stop swinging.
Note that when you fail to brake at the highest point, the glider will experience a collapse on the upper side which could lead to a riser twist or cravatte. Cravatte happens when the fabric of the wingtip becomes trapped in the lines.
Remember that this technique is dangerous. It requires precision and correct judgment. Therefore, it is always best to practice wingovers above water, away from any hillside or landing zone.
Can the Paraglider Brake?
Yes, your paraglider has a brake that will allow you to change direction or lower your speed. Brakes are exceedingly crucial for safety. In case of a malfunction, you can use the risers connecting to the rear of the canopy. It will help continue to steer your paraglider and decrease flight speed.
It is not enough to learn to use breaks when turning and steering your paraglider but to apply them when studying current wind and thermal air column conditions to keep you airborne and to help you avoid harm.
How Do Paraglider Brakes Work?
Paraglider brakes help you in changing the direction and speed of your flight. Other than shifting your weight, paraglider brakes act as the chief control. They are connected directly from the canopy to the pilot’s harness. Here are fundamentals for active flying.
- Yaw: When pulling the left brake, the glider yaws to the left, resulting from drag.
- Roll: Your paraglider rolls up as a result of lift from the yawing motion. If the glider yaws to the left, it will roll to the left as well.
- Pitch: It is when you rock forward and backward like a swing. It happens with the wing overhead, flying straight and applying the brakes smoothly, releasing them quickly.
You can do a perfect wingover maneuver when skillfully practicing the pitch, yaw, and roll. However, you also want to apply error-free judgment when using the breaks as you want to avoid collapsing and losing control of your glider.
How Is the Concept of Friction Used in Paragliding?
You may be wondering how to create friction while on air, but it’s actually reasonably simple. The key is drag. Drag occurs when pulling on the brakes, decreasing the speed of your paraglider. In addition, it will generate an uplift, where the wings stall and fall behind you. Drag is a necessary element in performing various paragliding maneuvers.
Be wary, though, because too much drag can cause your glider to collapse. On the other hand, when well navigated, you’ll see its relevance in safety, descent, and when executing different paragliding techniques.
What Is Trim Speed in Paragliding?
Trim speed is the airspeed of your paraglider once you release the controls. Several factors such as tailwinds, sink, lift, and head come into play and affect your overall glide.
Having a solid understanding of trim speed in paragliding will help you fly longer and higher and improve your all-in-all experience. It is necessary to know how to navigate this well. And it remains a constant process when flying.
Like most paragliders, you will get your best glide at or very near the trim speed. It is the best scenario with light to no headwind situations. A few basic things to remember, you fly faster in a sink and fly slower in a lift.
What Does Trimming in on a Paraglider Do?
Line trimming is necessary if you wish to maximize the performance of your paraglider. It helps increase the speed range of the paraglider by either increasing or decreasing the angle of the canopy. It is recommended to get your paraglider trimmed after two years or 100 hours of flight time. Because it has a higher speed of collapsing, it requires more pilot expertise.
Benefits of Trimming Your Paraglider:
- Additional safety factor: It will help decrease turbulence, have smoother turns, and increase the chance of collapse recovery.
- Your glider is in top shape: It optimizes the overall performance and experience while you are in the air.
- Competitions: It is part of the requirements to compete in a high-level competition.
- Increase speed: Trimming your paraglider can intentionally improve your speed in the air.
Trimming is part of the life cycle of your paraglider. With time and use, the lines will tend to shrink due to the nature of their materials. It is also required to comply with certification, especially if you wish to contend in professional competitions.
How Do You Use a Paraglider Trimmer?
It is crucial to get the measurement of your paraglider lines accurate. Even a couple of centimeters can affect its general performance. It is usually a service performed by a professional. They have the right tools needed to get the correct measurements and ultimately optimize your glider.
Materials Needed to Trim Your Paraglider:
- Laser Measurer: It is a highly reliable tool to measure each line of your paraglider accurately. It has a 1mm accuracy.
- Line Tensioning System: It is a well-calibrated system that ensures you get repetitive and accurate results.
- Excel: You will need Excel to store your data and interpret your measurements. It will help you look at anomalies and make necessary adjustments.
Part of the trimming process, and perhaps the most important one, is to get your paraglider tested. It is not enough that the data shows the correct measurements, as it is different when you do an actual test flight in the air. Further adjustments are imperative not only to optimize the performance of your paraglider. It is also to ensure you feel comfortable and safe to use it.
Can a Paraglider Stall?
The answer is, yes, your paraglider can stall. There are two different ways that this can happen. One is a Parachutal stall, where the wing appears normal and is descending like a parachute. The second is a Full Stall, where your paraglider completely stops flying and loses its shape.
A paraglider stall can be dangerous when you don’t react quickly or make the right judgments. To prevent the wing from total collapse, you will need instruments to measure your airspeed and angle of attack constantly.
What Is a Stall in Paragliding?
Stall in paragliding is when your wing produces less lift because the angle of attack has been reached or exceeded. Learning how to stall is extremely helpful when practicing acro maneuvers. However, it can be intimidating and dangerous as it requires expertise. So it is recommended that you do this above water, with supervision, and with a reserve.
When doing a stall, you want to decrease inertia by ensuring that the harness is adjusted and your feet tucked in, not long. You also want to be assertive when pulling the brakes of the wing, as waiting too long will result in an asymmetrical stall and lead to a total collapse.
Why Do Paragliders Stall?
Stall occurs when there is a reduction in the lift because the angle of attack is too high or beyond a certain point resulting in drag. It is when a pilot slows down the speed of the paraglider, and you swing up, the wing behind you. If not performed correctly, it can result in a complete collapse.
A stall can occur depending on the air conditions and how you fly. Therefore, it’s crucial to confirm the rear lines of your glider aren’t contract, that your breaks aren’t tied too short, or that you go beyond the speed of your trim setting.
What Is the Stall Speed of a Paraglider?
Different factors can affect the stall speed of your paraglider. The recommended stall speed for paragliding is 20 km/h (12 mph). Going slower than that may result in a total collapse.
The ideal weather to try a stall is when the wind is dry with winds less than 18mph (29 kph). In case of emergency, always have a reserve with you.
What Happens When a Paraglider Stalls?
The wing will cease to produce lift when your paraglider stalls.
A well-performed stall is when breaking slow, the tail of your wings fold, and you swing up with the canopy on your back without any collapse. You want to avoid releasing the brakes too quickly as the glider may shoot back too fast, and you may lose control. Braking precisely is pivotal to preventing a challenging stall.
You will also want to consider the current wind conditions and thermals when your paraglide stalls, so you can pass correct judgment and perform the proper maneuvers. Again, doing so will increase your safety.
How Do You Stall a Paraglider?
Learning how to stall a paraglider is essential to improve safety and boost your confidence in the air. It is also an introductory way to the world of acro paragliding. The Full Stall is an acro maneuver and recovery technique. Once you do this well, you can do acro paragliding safer.
How to Perform a Full Stall:
- Before you fly, ensure that you execute a maintenance check on your gear and the lines of your paraglider.
- You want to decrease the chances of spinning by setting your harness into a sitting position with your legs under it.
- Start to slow down your paraglider by pulling on the brakes symmetrically. Avoid slowing it down lower than stalling speed.
- Wait to be stabilized before you pull down the brakes completely. Pulling too slow may cause an asymmetrical collapse.
- You will then swing up while the wing stalls and falls behind you.
- You will notice that the force of the glider is heavy and difficult to control. Therefore, you want to release the brakes a little bit, depending on your brake setting, but symmetrically, until you see the wing of your glider calm down.
- If correct, your glider will move forward with only the wingtips folded while you fly backward.
- To exit, release the brakes quickly.
- Your glider will then shoot forward. Control the surge by gently braking, always symmetrically.
- Practice with supervision, above water if possible, and with a reserve.
A warning, don’t release the brakes too quickly when the canopy is behind you not stabilized. If it happens, the wing may violently shoot forward as you swing back. You want to avoid falling into the canopy as the surge may be too strong.
Can a Paraglider Collapse?
Yes, your paraglider can collapse. It can be varying factors, such as the current wind conditions. Most of it, though, lies heavily in the judgment and maneuver of the pilot. Here are some ways you can prevent or recover from a collapse.
Tips to Prevent Paraglider From Collapsing:
- Stay out of turbulence.
- Avoid robust thermal conditions.
- The further your wing goes forward, the higher the chance of a collapse.
- Avoid flying slower than recommended stall speed.
- Do a thorough maintenance check before and after paragliding.
- The glider will turn you towards the side that collapsed, so shift your weight to the opposite side for recovery.
- Always look at where you’re going. Avoid any obstacles.
- Enroll in a Paragliding school. You will receive training and find people to help and mentor you.
- Do an annual wing servicing to keep the integrity of your paraglider and ensure that it’s in top shape.
- Be knowledgeable of weather conditions.
A good start to prevent your paraglider from collapsing would be to recognize situations that could lead to that. It’s critical to analyze rough conditions and respond to them promptly. Visualize what you would do in any scenario to help prepare you and improve your reaction speed.
Why Do Paragliders Collapse?
Your paraglider may collapse if you are unable to maneuver it precisely. For instance, when you pull the brakes asymmetrically, perform a hard turn, and fly slower than recommended stall speed. Here are a few examples that may lead to an extreme situation.
Potential Collapse in Paragliding:
- Asymmetric Collapse: Breaking too slowly can cause the tucked wing to induce a turn. This will make the pilot tilt and potentially lose control.
- Spin: There is a risk of a negative spin when you slow down the paraglider and then perform an abrupt turn.
- Front Collapse: It occurs when your fly into a strong downward current of air and is more likely to happen when using a speed bar.
- Deep Stall or Parachutal Stall: This type can be hard to recognize because the falling speed of a paraglider is similar to a forward airspeed in standard flight. The canopy remains inflated, but forward airspeed is lost, hence, the continuous descent.
Beginner or not, you will want to paraglide with supervision or with a friend with you. Don’t fly in an area above your skill level to avoid an emergency.
What Causes a Paraglider to Spin?
In a paraglider, a spin occurs when either side of the wing stalls. It is due to lack of airspeed and high angle of attack, commonly caused by yanking the break on one side too hard. It also happens when entering a powerful thermal, where the chance of spinning increases when the pilot slows down.
You can avert your paraglider from spinning by gradually turning controls smoothly and in conjunction with weight shift. Be aware of the glider’s position when flying slowly to quickly react when you feel the wing slipping instead of turning.
How Do You Spin a Paraglider?
Learning how to spin is part of a pilot’s experience to make the most out of paragliding. There is a danger of a stall when turning, so it is critical to learn how to pull the brakes at the right time. As a basic rule, you pull on the right brake if you wish to turn right and yank on the left brake when you want to turn left.
How to Spin a Paraglider:
- Before flying, begin by executing a checkup on all the lines of your paraglider.
- Prepare by setting your harness into the sitting position, your legs under it. Doing this will prevent a riser twist.
- When in the air, grab the right brake and pull the left brake all the way down, not too hard. You also want to shift your weight on the same side as you pull on the brake.
- You will then notice the glider spinning in front of you for at least 1 to 2 turns.
- For standard flight, release the left brake and pull down gently on the right brake simultaneously.
Another Method:
- Before flying, begin by executing a checkup on all the lines of your paraglider.
- Prepare by setting your harness into the sitting position, your legs under it. Doing this will prevent a riser twist.
- Slow down the glider first and brake symmetrically until the canopy stabilizes.
- Release the right brake, and pull down the left brake immediately like a Full Stall.
- You will then notice the glider will start to spin.
- To exit, pull down the right brake to return to standard flight.
A warning, ensure that your body turns as fast as the glider to avoid riser twist. If a riser twist happens, you can recover by grabbing the lines over and turning yourself back.
How Do You Get Out of Spin While Paragliding?
A glider will only spin when the pilot pulls on one brake to go left or right. It will continue as long as you hold down the brake. When you decide to stop spinning, you can recover as soon as you completely release the brake. Avert from yanking the brakes too hard as it may cause one side of the wing-tail to collapse.
A spin, especially a negative spin, can become violent and disorienting, where the wing could collapse and lead to a spiral dive. Rapid whirls can twist the lines together and lock the brakes, which would lead to a difficult recovery. Be careful and avoid flying in the middle of thermal traffic.
How Do You Mac Twist in Paragliding?
A Mac Twist is a dynamic technique where the pilot swings out from under the glider while spinning fast on its side. It is dangerous and requires a high level of expertise. It is recommended to learn Spin and Full Stall before attempting this maneuver.
Steps to Do a Mac Twist:
- Prepare by setting your harness to a sitting position with your legs under it to avoid the risk of getting a riser twist.
- Begin by doing a Wingover or an Asymmetric Spiral. Then, exit quickly and symmetrically without losing energy to generate a significant climb.
- When you reach the lowest point, grab the outer riser and pull a negative. You will now swing up while the glider spins behind you.
- Always do a Mac Twist in the same direction. Generate a fast rotation by starting early, where the energy is highest.
- To exit, keep the glider spinning until you swing back underneath.
- Pull down the outer brake gently to stop the rotation.
- Release the brakes once the glider stabilizes. Control the surge.
- Another option is to perform a Full Stall, which should be a safer option.
You’re at risk of collapse through riser twisting or opening up your reserve. So be sure that you have a plan in your mind before executing this technique. Some lines can break if your glider misses maintenance before flying.
How Do You Spiral Dive in Paragliding?
A spiral dive is a steep descending turn resulting in a significant increase in airspeed and loss in altitude. This technique is as essential as the Full Stall, as it helps the paraglider lose height quickly when at a high altitude. It is considered an advanced technique and will deal hugely with G-force, hence performed with supervision.
How to Spiral Dive:
- Prepare by setting your harness in its most upright position. Doing this will help your body adjust to the G-force.
- Apply brake on one side while shifting your weight in the same direction.
- You will notice the wingtip approaching the horizon as it picks up more speed until the angle between the horizon and leading edge decreases.
- The wing should now face the ground, often called the nose-down spiral.
- As soon as you feel the drop-in, squeeze your brake a little more to lock the glider into a spiral. If executed correctly, the glider should drop between 90 and 180 degrees of rotation.
- Now you want to retain a certain speed with progressive braking. To maintain the rotation, release some brake.
- To know if you are braking too much, you will notice the outside wingtip closes. This is because it may slow down the rotation.
- To obtain the maximum sink rate, you want to let it spiral as fast as possible with little input.
- When turning at high speeds, you can modify the pace by adding short kicks on the brake. It is also one way to initiate the exit.
You will know that you are in the spiral when you feel the G-force instantly picking you up and pushing you up into the harness. You should be facing the ground with a clear circle of vision while your peripheral vision is blurred.
How Do You Exit a Spiral While Paragliding?
It should be easy to exit a spiral, but it takes finesse. One crucial factor to consider when doing a spiral dive is to leave enough altitude to avoid any accidents. With enough height, you will have time to overcome any potential problem. Do not exit too quickly from a spiral dive, as it may be too hard to control a surge.
How to Exit a Spiral:
- Start to slow your rotation down by gently pressing on the inner brakes, coupled with weight shifting.
- Once you feel the remaining energy and speed are gone, weight-shift out of the spiral by returning to a straight slide like a regular tight turn.
Apply multiple countersteering inputs as necessary, coupled with weight shifting, to have more control of the glider and decrease speed. Knowing how to deal with the pace and the remaining speed safely can prevent an unwanted stall or a collapse.
How to Do an Asymmetrical Spiral in Paragliding?
An Asymmetrical Spiral is similar to a Wingover where the timing of braking and weight shifting is alike. Although you don’t swing as high as you would in a Wingover, Asymmetrical Spiral offers more energy, making it one of the most dynamic maneuvers.
Steps to Do an Asymmetrical Spiral:
- Prepare by loosening your chest strap for better weight shifting.
- Begin by doing Wingovers. Once the timing is right, continue the movement to one side without changing the direction of turns.
- After passing the highest point in the last Wingover, do a straight and symmetrical dive by shifting your weight to the left.
- Add a robust brake input and shift your weight to the right the moment you are under the glider. It should result in a fast turn.
- After passing the highest point, shift your weight to the left and do a symmetrical dive.
- Repeat as needed.
- Exit from an Asymmetrical Spiral by decreasing the energy gradually in 1 to 2 turns.
You’ll notice that in a Wingover, you start to shift your weight and pull the brake at the same time before you are close to the lowest point. On the other hand, in an Asymmetric Spiral, you tug the brakes and shift your weight at the same time when you are close to the lowest point. In both these techniques, there is a danger of collapse and cravatte if the timing isn’t precise.
How to Do Looping in Paragliding?
Looping is one of the oldest acrobatic maneuvers dating back to 1994 by the pioneer Andre Bucher. It is when the pilot passes above the middle of the wing. Here are instructions on how to perform this in paragliding.
Steps to Do Looping:
- Start by doing an Asymmetric Spiral.
- Once you have the right momentum, reverse the direction to the other side, as you would in a Wingover.
- You can gradually practice this technique by weight shifting early, just after passing the highest point. You can then pull on the brakes before swinging back under the glider. This way, Looping won’t be high, but it will be safer and faster.
- You can then increase your height from there the more you feel confident.
- To exit from Looping, decrease the energy slowly in 1 to 2 turns.
Looping can be challenging, so it is recommended you start with lower swings for safety.
A warning: the glider can easily experience a collapse or a cravatte if there is not enough energy and momentum in place.
Paragliding Spin vs. Spiral
A spin occurs when you pull on one brake hard that half of the wing stalls. You can recover from this as soon as you completely release the brake. On the other hand, a spiral is the extension of a steep turn where you are thrown out horizontally from the glider. The speed builds up so that the leading edge can be pointing towards the ground.
One main difference between a spin and a spiral is their airspeed. The airspeed in a spiral increases while there is only little airspeed felt in a spin. Therefore, a spin is always pilot induced, while a spiral can occur resulting, to collapse. Spiral can be dangerous as G-force can black you out completely.
What Is an SAT in Paragliding?
SAT or Safety Acro Team is a maneuver invented by Raul Rodriguez in 1999. It is similar to a spiral where the center of rotation is between the glider and the pilot. However, it is different from a spiral dive or a deep dive, where you turn slowly rather than fast.
SAT is fundamental and is a basis maneuver for Asymmetric SAT and Tumbling. These are both invented by Raul Rodriguez in 2000 and 2001 consecutively. Another is Rhythmic SAT, a technique innovated by David Arrufat.
How Do You Perform Asymmetric SAT in Paragliding?
In the year 2000, Raul Rodriguez invented Asymmetric SAT. It’s when the axle of rotation is steep, and the pilot swings above and under the glider. This technique is an introduction to practicing Tumbling.
Steps to Do an Asymmetric SAT:
- Perform a well-timed Asymmetrical Spiral to the right to build up dynamic.
- After passing the highest point, grab the left riser and pull an SAT to the right with weight shifting, like you would when doing an asymmetric turn.
- There are two different ways to exit; if the Asymmetric SAT is not too high, transform it into a simple SAT by keeping the brake.
- If the Asymmetric SAT is high, for instance, around 130 degrees or more, press the brakes to stop the rotation. It is advised to exit after two turns to have enough energy and avoid collapsing to the wing.
Before performing this technique, imagine it clearly in your head to avoid panic while in the air. It is crucial to have the correct timing of exit and that your glider is in its top shape.
How Do You Perform Tumbling in Paragliding?
Invented by Raul Rodriguez in 2001, it was considered the most dominant and dynamic maneuver. It is similar to Asymmetric SAT, but the axle of rotation can be high that the pilot passes above the middle glider. Here are instructions to execute this technique.
Steps to Do Tumbling:
- Begin by doing the asymmetrical spiral to the right.
- Once you gain energy, pull an SAT to the left with weight shifting, the same as you would in Looping.
- Keep the brakes and relish the high G-force effect.
- To exit, press on the brakes as soon as it starts to dive again. It is similar to the Asymmetric SAT.
- Remove the remaining energy by braking hard to avoid collapse.
- If there is less energy, perform a Full Stall where you swing back under the glider to return to standard flight.
A well-performed Tumbling has enough energy for entry. However, getting the precise timing of the exit is the most essential. It is strongly advised to exit the Tumbling after two turns to have enough energy and avoid falling into the canopy.
How Do You Perform Rhythmic SAT in Paragliding?
Invented by David Arrufat, Rhythmic SAT is considered one of the most challenging maneuvers. There are only a handful of pilots who can perform this with finesse. Only the best and most dynamic acro gliders are suitable to execute this technique.
Steps to Do a Rhythmic SAT:
- Begin by doing an SAT to the right. Take as much speed as you can before you enter.
- Quickly release the brake entirely as soon as the right glider changes the angle into SAT. The glider should now be below you.
- When the glider reaches the lowest point below you, pull back the brake hard to adjust to a high angle again.
- When the glider’s at its highest point, release the brake quickly again. You’ll notice that you start to swing above the glider.
- Repeat steps 3 and 4 until you build up a rhythm.
- To exit, based on which period you are in, move out using either Tumbling or Asymmetric SAT.
When doing an exit, ensure that it is before the wing collapses. For example, look at your glider and notice if the outside tip loses pressure and collapses when the glider is below you.
How Do You Get Rid of Big Ears Paragliding?
Big Ears is a paragliding maneuver that helps with descent by pulling down the outermost A lines, resulting in folding wingtips and reducing the surface area. It is a necessary technique that’ll enable you to sink faster without the extra G-force. With proper execution, this is simple to engage and release.
Tips to Properly Execute Big Ears:
- Clear the ears by coming off the speedbar and giving the wing time to adjust to a slower speed.
- Clear the ears before landing, at least with enough altitude to spare in case of emergency.
- Ensure the canopy is directly overhead when pulling the A lines.
- If using a speedbar, push half of it to help reduce the angle of attack.
- It is not recommended to let go of the brakes to make sure you react quickly when in a bad condition.
Practice Big Ears in mild conditions to hone your skills. When practicing, notice if the glider wings fly slower or faster with the Ears in the adjustments necessary to get a steady descent.
What Makes a Paraglider Stable?
Your paraglider is a sturdy inflatable wing. Equipped with materials such as multiple lines and risers for control, a secure harness system for safety, and an elliptical-shaped canopy made of durable synthetic fabric, they are all to make your paraglider stable. As a result, your paraglider will stay long, smoothly, and safe in the air coupled with the right weather conditions.
The wing’s elliptical design allows it to glide through the air seamlessly. Its line and harness system also add to its solidity, as it enables the pilot to have complete control of the glider, directing the altitude by going through thermals and setting the way to go.