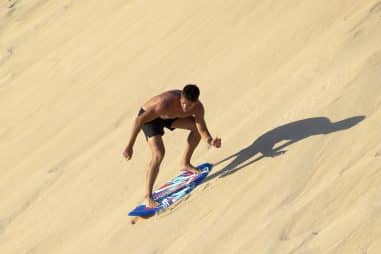
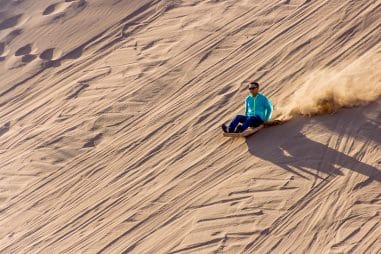
Sandboarding seems to be a come-as-you-are type of sport. There is no need to purchase any top-of-the-line equipment and you don’t need to go to a session clad in a specific sports outfit. This, along with the fact that sandboarding spots are very accessible, makes the sport even more alluring.
What Are Sandboards Made of?
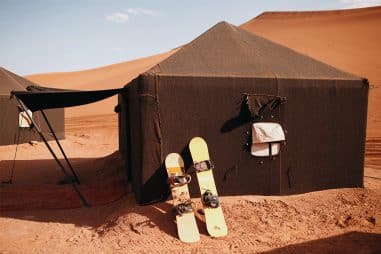
There are different materials with which sandboards are made of. The most common materials used for making sandboards are hardwoods, plastic, and metal.
Of the three, hardwoods are often the go-to for manufacturers. They often go for oak as their hardwood of choice and they cut it, so the board is between 9 to 12 millimeters thick. Custom boards can even be made thicker up to 15 millimeters.
Arguably, the most important part of a sandboard is the base as this is the one reducing friction against the sand. They are usually made from Formica or laminex, depending on whether your board is made to slide on wet or dry sand.
What Can You Use for Sandboarding?
If you have no access to actual sandboards, you can do away with several alternatives. These may include, but are surely not limited to, the following:
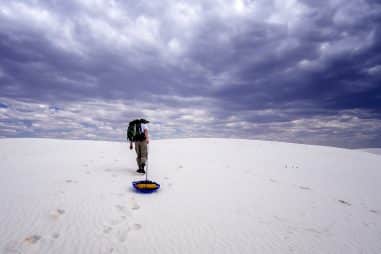
- Sleds
- Snowboards
- Surfboards
- Skateboard decks
- Bodyboards
- A piece of wood or a plank
Sandboarding can really be a no-fuss sport that doesn’t require any special equipment. Anything that can take you from the top to the bottom of the dune can be good enough. But of course, having a really good sandboard with you can make your experience extra fun.
Can You Sandboard With a Skateboard?
You can definitely sandboard with a skateboard deck. This is one of the easiest alternatives when you really want to go sandboarding but a sandboard is not available. The two boards are often made with the same materials which makes skateboard decks sand-friendly.
Before getting on the sand, the first thing that you have to do is to remove the wheels from the base of the deck. After which, you would need to get wax and apply that properly on the base before sledding down.
How Do You Make a Homemade Sandboard?
Good news if you are into DIY-ing your own things: making a sandboard is doable, less costly, and self-fulfilling especially if you would rather make a project out of making a sandboard than buying one.
Here are the materials that you would need for making a homemade sandboard:
- Deck material: It is recommended to use lightweight hardwood that is around 100 to 150 centimeters long. The most commonly used hardwoods for sandboard making are maple and oak. Pro tip: It will be easier if you just repurpose an old skateboard, snowboard, bodyboard, or surfboard.
- Base material: You can either choose between Formica or laminex. The extra layer of laminate on your board is very important because this will reduce the friction between your board and the sand allowing for a smoother ride.
- Foot bindings: To hold your feet in place as you slide.
- Additional materials:
- Strong wood glue
- Screwdriver and screws
- Optional: paint or stickers to decorate your board
But before you go into the actual construction, you should first consider three things—the type, the design, the shape, and the weight of the sandboard that you need.
Four types of sandboards:
- Terrain board: Suitable for sliding down small dunes, the terrain board is more compact, and it is designed to have a swallow tail or a v-shaped tail.
- Race board or pro board: Made with a square tail and designed to have a longer deck, this board is great for sliding down taller dunes and mountains.
- Carve board: This board is designed to have twin tips that have equal, round edges. They are great for carving, freestyling, performance riding, and jumping tricks.
- Sand sled: A sand sled is great if you like sliding while sitting and lying on your back or your stomach. The edges are not asymmetrical, and they often come in either round or square tails. Due to the riding style, the body of the board needs to be at least 25 centimeters wide (big enough so it can fit one to two persons) and at least 100 centimeters in length for kids and 110 centimeters for adults.
Design and shape of the sandboard tail:
- Twin tips or round tail: This tail is designed to be identical and round on both edges making it possible to be ridden on either direction.
- Square tail: If you are in it for the speed, then this is the tail design for you.
- Swallow tail: This is easily recognizable as this comes in the shape of a V. This tail is great for quick turns and they are easy to be maneuvered.
Weight of the sandboard:
While it is a general rule to make it as lightweight as possible, your skill level also affects the length of the sandboard.
- If you are a beginner, it is best to have a shorter board that is around 100 centimeters.
- Longer boards ranging from 120 to 140 centimeters are often better for intermediate or advanced riders because they allow riding at higher speeds and they are great for carving.
If you have made up your mind about these design decisions, then you can now start the construction of your board.
Step 1 – Shaping: If you have decided to repurpose a board that you have, and you don’t wish to change its tail design then you can skip this step. But If you are making your board from scratch, then read on.
You should ensure that the edges of the board are not flat and that they are slightly bent upward resembling a closed-mouth smile. To achieve this, follow these steps:
- Keep your flat board submerged in water with heavy weights lying in the middle of the board. Leave your board like this for a couple of days.
- Check the results after a couple of days by taking it out of the water and drying it.
- Repeat this process until the board loses its flatness and resembling a skateboard.
Step 2 – Assembly: Once you are happy with the shape of your board, get your adhesive and stick your chosen base material (Formica or laminex) to the bottom of the board. Make sure that the bottom is completely coated with the adhesive so that the base material and the board are properly glued together.
Step 3 – Incorporate the bindings: You would need something to hold your feet in place, this is where the foot bindings come in. Place the bindings so that they are both parallel to the board and each other. Get your screws and screwdriver and make sure that they are properly fastened on top of your board.
Now that the construction is done, make sure to regularly wax the bottom of your board. Remember that the sandboard wax is your friend so make sure that you slather it on the base of your board before you get on the sand and even in-between rides.
What Do You Wear for Sandboarding?
While there is no rule on what to wear or what not to wear when sandboarding, some of the basic and most recommended things to have on hand include:
- Sunscreen
- Hat
- Helmet
- Knee and elbow pads
- Goggles, sunglasses, or any kind of eye protection
Here are some tips on clothes and footwear to remember when sandboarding.
- Never wear flip-flops.
- It is better to wear sandals or closed-toe shoes.
- Wear lightweight and comfortable clothes.
- Preferably wear shorts or lightweight trousers that would reach your knees especially if you will ride lying down or lying on your stomach.