To inflate and deflate your board requires a pump. Your board must be clean and thoroughly dry before packing. Constantly check your board for dents, holes, and cracks and repair them with a repair kit.
How Do You Pump Up an Inflatable SUP?
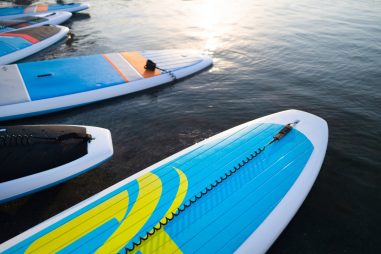
Inflatable stand-up paddle boards are more popular than traditional boards because of their portability and convenience. There are two ways to inflate your SUP, which will vary according to your preference.
- Hand Pump: A manual pump is usually bought together with your SUP. It is easy to use and is a convenient way of warming up before paddle boarding. You can also take them anywhere with you and use them wherever you are as you won’t need a power source.
- Electric Pump: An electric pump requires a power source to operate. Most paddle boarders use their car’s battery as an electric source. Unlike manual pumps, an electric pump can inflate your board in less than 10 minutes. It also automatically shuts down when you’ve reached the set psi.
Although hand pumps are portable, manual inflation is exhausting to do. Because it takes effort, inflating your board can also take more than 15 minutes. On the other hand, electric pumps are manageable, but it can be challenging to locate a power source. In addition, you will have to check where to inflate your board if you are not using your car battery.
How Do You Inflate SUP With Electric Pump?
Electric pumps are typically more expensive than manual pumps. However, if you have decided to upgrade and invest, follow the steps below to check how to inflate your stand-up paddle board with an electric pump:
- Prepare your board by laying it on a smooth, flat surface with the valve on the tail facing up.
- Open the valve cap. Check if your valve stem is in the most upright position. It varies in color, but the stem/pin is usually yellow.
- If not, press on the valve stem and twist it either clockwise or counterclockwise (depending on the instruction written around the valve), ensuring it’s in the most upright position.
- Your electric pump comes with a hose. Connect the hose to the electric pump if it isn’t connected.
- Connect the other end of the hose to the valve stem. Double-check if the hose is secured so you won’t lose air.
- Set the preferred psi on your electric pump.
- Once set, click on start. Let your electric pump fill your inflatable SUP with air automatically.
- Depending on the size of your board, it can take up to 10 minutes to fill up.
- Check your board consistently to see if the board is filled with air enough that it can hold your weight while on water.
- The electric pump will automatically shut off once it has reached the set psi. Turn the hose in the opposite direction you locked it into and put the valve cap on.
You will notice that your board will inflate very fast in the first few minutes. Don’t panic as it is normal. When it reaches 10psi, your board will start to fill up slowly.
Can You Inflate a SUP With a Compressor?
There are specific air compressors designed to inflate your stand-up paddle board. The reason is that using just any compressor can ruin your SUP. It can be through moisture or accidentally blowing it up because the compressor is too fast and incompatible with your paddle board.
It can be tempting to use a readily available air compressor in your garage but you shouldn’t. You should stick to compressors designed for inflatable stand-up paddle boards for safety. They will keep your board safe from moisture and avoid the risk of any accidents. This way, you can prolong the life of your board.
How Do You Inflate a Fanatic SUP?
Now you’ve got your first inflatable stand-up paddle board from the brand Fanatic, follow the steps below to inflate your board safely and correctly:
- Take out your board, your hand/electric pump, and detachable fins from the bag.
- Unroll your inflatable paddle board on a smooth, flat surface. Be aware of pebbles or small rocks.
- Turn the board with the valve facing upwards. Then, remove the valve cap.
- To put the valve stem/pin on the upmost position, twist the valve and turn it clockwise or counterclockwise.
- Connect the air hose to your pump. Then, connect the other end to the valve by turning it clockwise to secure.
- Position your hand pump upright and switch it to double-stroke action. Start pumping your board.
- If it gets exhausting to pump, switch the pump to single-stroke action to reach full pressure easily.
- Once you’ve reached the desired psi, twist the air hose off and place the cap on the valve to secure it.
- Flip the board over to attach the removable fins. Use the screw to connect the little plate at the front of the fin box, with the end of the fin base first, sliding it backward.
- Use the fin screw to connect the screw and the plate through the hole.
The minimum recommended psi for a Fanatic stand-up paddle board is 15. However, if you want more stiffness, you can inflate the board up to 20psi. Like most inflatable SUPs, this board comes with a hand pump.
How Do You Inflate a Red Paddle SUP?
You’ve received your first Inflatable stand-up paddle board from Red Paddle. Now, you notice that it comes with a lightweight Titan pump. If you want to know the right way to inflate this type of board, follow the steps below:
- Remove your inflatable board and your manual pump from the bag.
- Unroll your board on smooth, even ground guaranteeing it’s away from sharp objects.
- Place the board up with the valve facing upwards.
- Remove the dust cap.
- Move your center pin to its uppermost position by moving it either clockwise or counterclockwise.
- Prepare your Titan pump by connecting the air hose to it. Then, connect the other of the nozzle to the valve.
- Insert the stopper into the back of the pump handle and twist it to lock it in place.
- Start pumping until it reaches the desired psi.
- If it gets too difficult to pump, remove the pump stopper on the back of the handle. It should make it easier for you to reach full pressure.
- Once your board has reached the psi and is stiff enough according to your preference, remove the hose and place the dust cap back on to secure.
When pumping, begin by keeping your legs straight and your arms on the handle. Next, push down by bending your knees with your arms straight. Doing this will allow the weight of your body down onto the pump without forcing too much energy.
How Much Do You Inflate a SUP?
Each inflatable stand-up paddle board has a different recommended psi per brand. Generally, the amount of pressure advised is around 10 to 15psi, with 20 to 25psi as the highest recommended pressure. Refer to your board’s manufacturer to see what the suggested minimum and maximum air pressure should be.
Take note that higher psi doesn’t mean higher performance and durability. Once you’ve reached the recommended pressure, performance and durability will stay the same. You will find that as you inflate further, it will only make your board stiffer, making it hard for you to secure the valve.
Can You Overinflate a SUP?
Your inflatable stand-up paddle board can burst if you increase the pressure by more than 25psi. It is physically impossible with a hand pump as it is already very taxing to get to the recommended psi. If you are using an electric pump, it automatically shuts off once it reaches the psi of your choice.
However, air compressors can void your warranty and increase the risk of overinflating your board. In addition, too much pressure on your board can lead to damage. Avoid using air compressors that are not suitable for your inflatable paddle board.
What PSI Should My SUP Be?
Each inflatable stand-up paddle board brand provides a different recommended psi. To see what the suggested psi is for you, take a look at the following brands below.
- Fanatic: The ideal psi for Fanatic boards is 15. The highest maximum pressure is 20psi.
- Red Paddle Co: Red Paddle Co boards can take a lot of pressure and recommend 15 to 22psi for general use.
- Atoll: The suggested minimum psi for your Atoll board is 10. The highest is 15psi.
- iRocker: The recommended pressure for iRocker boards is 15psi. For additional info, their boards can hold up to 23psi but will not add an advantage in terms of performance.
- ISLE: The suggested psi for ISLE paddle boards is 13 to 17psi.
- Bluefin: The recommended psi for a Bluefin board is between 15 to psi. The maximum inflation is 28psi.
- BOTE: Bote paddle boards advise pressure between 10 to 15psi. Some BOTE boards cannot be inflated by more than 10psi.
- Nixy: The recommended pressure for a Nixy paddle board is 15psi.
- Serene Life: The maximum recommended psi for Serene Life paddle boards is 15.
- Blackfin: The suggested air pressure for Blackfin paddle boards is between 10 to 18psi.
When looking for an inflatable paddle board, a tip would be to choose a board with a recommended psi of 15 or higher. It means that the board is well built for high pressure and has high-quality construction.
How Do I Check My SUP PSI?
You can check how much psi is on your board by looking at the gauge attached to your hand pump or electric pump. Some pump gauges are separate and must be connected to your pump first before inflating. Some equipment has the gauge affixed to them automatically. Always double-check this as soon as you receive your paddle board and before inflation.
When using a manual pump, you will notice that the gauge is not moving for the first few minutes. The needle will start to move once you reach more than 10psi. Your electric pump will show the current psi and will shut down once it meets the desired pressure.
How Long Does It Take to Pump a SUP?
The amount of time it takes to inflate your stand-up paddle board will depend on the type of equipment you are using. For instance, if you’re using an electric pump, the board can reach the set psi in less than 10 minutes.
However, if you’re using a manual pump, adding air pressure to your board can take more than 20 minutes, depending on how fast you are pumping.
If you prefer to use your electric pump, you have 10 minutes of free time to relax, unwind, or do a warm-up exercise. On the other hand, using a manual pump can take a while and is tedious. Although that is the case, you are welcome to take breaks and take all the time you need.
How Do You Set Up a SUP Paddle?
Now that your stand-up paddle board is ready and well-inflated, you’ll want to set up your paddle next. Paddles come in three-piece models that make them portable and easier to carry. Here are steps to follow to set up your SUP paddle properly:
- Distinguish the parts of the paddle to arrange them correctly. There are usually three, the blade section, the middle shaft, and the handle section.
- Take the blade and the middle shaft sections.
- Open the latch of the middle section while you push down on the spring tab of the blade section.
- Attach them by aligning the ends. Next, place the spring tab on the hole, and close the latch to secure it.
- Attach the handle to the middle section, and align according to your preferred height.
- Close the latch to fasten.
- Check your paddle if there is any movement. Ensure the latch is locked, or use a screw (if any) to tighten further.
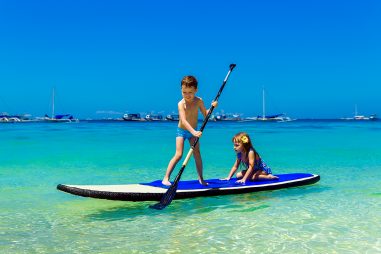
Usually, boards come with a paddle to complement the performance of your paddle board. Consider learning how to maneuver your board using your paddle to avoid expending too much energy on zigzag strokes.
How Do You Adjust the SUP Paddle Height?
There are paddles available that are in fixed lengths, and some are movable. If your paddle is too long, it can be unmanageable. A paddle that is too short can keep you from maintaining a straight body posture. If you have an adjustable paddle, here are a few things you want to consider when adjusting your SUP paddle:
- Place your paddle on leveled ground.
- Stand straight by the side or in front of your paddle.
- Reach your arm up and check where your wrist is.
- To get the correct length, adjust the height of your paddle according to the height level of your wrist.
- Your wrist should be able to bend and rest on the top of the handle.
The T-grip handle is the most common way to size up your board. It can also be adjusted longer or shorter if you are racing or surfing. To keep your paddle maintained, avoid contact with rocks or any hard surface to prevent damage or dent on your paddle.
Where Do You Put the SUP Leash?
Your SUP leash is attached either to your left or right ankle. The other end is attached to the D-ring, typically where the valve is. Never underestimate the importance of wearing your leash. It is your most important piece of safety equipment as someone venturing in the water.
All paddle boards come with a D-ring on the tail to put your leash on. Not all paddle boards, though, are issued with a leash. Once you receive your board, check immediately if it comes with a leash. Buy a separate one if necessary.
How Do You Attach an Ankle Leash to a SUP?
Again, your leash is your safety equipment. Depending on where you are paddle boarding, some places mandate a leash as part of the law. To learn how to attach your ankle leash to your stand-up paddle board, heed the steps below:
- Place your board on the flat ground, and notice where the D-ring is.
- Check your leash to identify which end connects to the board and your ankle.
- The end with the nylon strip attaches to your board. The end with the cuff is for your ankle.
- Fold the velcro over three times.
- Run the nylon cord through the D-ring and loop a knot.
- Take the velcro leash through the nylon cord. The nylon cord should now be in the middle of the leash.
- Fold the velcro leash three times to secure it.
- Attach the cuff to your ankle not too tight and not too loose.
The reason you need a leash is for safety. When you accidentally fall on water, it ensures that the board is only a few feet away from you and within reach at all times.
How Do You Deflate an iSUP?
Now that you have finished paddle boarding and are ready to pack up, you will need to learn how to properly deflate your inflatable stand-up paddle board. Your manual or electric pump can help with the process, or you can release the air out without equipment. To know how, go through the steps below:
Using a Hand Pump
- Place your board on a smooth, clean surface with the valve facing up.
- Open the valve cap.
- Push down on the valve stem/pin and twist it clockwise or counterclockwise to let the air out.
- Prepare your hand pump by attaching the air hose to the deflation side of your pump. Then, attach the other end to the valve stem.
- Starting with your knees straight and your arms on the handle, push down by bending your knees while keeping your arms straight to take air pressure out.
- Push down and pull up until all the air is out.
Using an Electric Pump
- Place your board on a smooth, clean surface with the valve facing up.
- Open the valve cap.
- Push down on the valve stem/pin and twist it clockwise or counterclockwise to let the air out.
- Prepare your electric pump by attaching the air hose to the deflation side of your pump. Then, attach the other end to the valve stem.
- Turn on your electric pump and let it suck the air out.
Without Any Equipment
- Place your board on a smooth, clean surface with the valve facing up.
- Open the valve cap.
- Push down on the valve stem/pin and twist it clockwise or counterclockwise to let the air out.
- To help speed up the process, gently press down on the board.
- Once most of the air pressure is gone, start rolling from the nose to the tail to let the remaining air out.
Remember that your inflatable paddle board is vulnerable to moisture. Before deflating, clean your board with mild soap and fresh water, and dry it thoroughly first. If your paddle board has a removable fin, take them off too before deflating.
How Do You Deflate a Fanatic SUP?
You had so much fun on the water and are now ready to deflate your Fanatic iSUP. Follow the steps below to deflate this type of board correctly:
- Wash your board with mild soap and clean, fresh water.
- Let your board dry thoroughly.
- Remove the detachable fins and secure them in your board bag.
- Place the board on leveled ground, with the valve facing up.
- Twist and open the valve cap.
- Push the valve stem/pin down and twist it to the deflation setting. You will hear air rushing out.
- If your pump has a deflation feature, connect the air hose to the valve and start pulling up and pushing down.
- If you’re using an electric pump, connect the air hose to the valve and turn on your pump to let it suck the air out.
- If there is no equipment, let the board deflate on its own and help speed up the process by gently pressing it down.
- To take the remaining air out, roll your board from the nose to the tail.
When drying your board, avoid exposing it directly to the sun’s heat. Instead, leave it on a shaded area as you allow it to dry.
How Do You Deflate an Atoll SUP?
If you have an Atoll iSUP and want to deflate your board, check if your manual pump has a deflation feature, or use your electric pump if you have that. Follow the steps below to do this correctly:
- Wash your board with mild soap and clean, fresh water.
- Let your board dry thoroughly.
- Place the board on a flat surface and remove the detachable fins. Secure them in your board bag.
- Flip the board with the valve facing up.
- Twist and open the valve cap.
- Push the valve stem/pin down and twist it to a down position. You will hear air rushing out.
- If your pump has a deflation feature, connect the air hose to the valve and start pulling up and pushing down.
- If you’re using an electric pump, connect the air hose to the valve and turn on your pump to let it suck the air out.
- If there is no equipment, let the board deflate on its own and help speed up the process by gently pressing it down.
- Roll your paddle board from the nose to the tail to take the remaining air out.
Once all the air is out, remember to put the valve back into the inflate position to prevent air from reentering the board. Also, avoid leaving your board in direct sunlight; never wash it with salt water as it is corrosive.
How Long Does It Take to Deflate a SUP?
Deflating your stand-up paddle board is faster than inflating it. Using either a hand pump or an electric pump can help it release the air pressure faster. You also have the option to let the air out on its own. All in all, deflating shouldn’t take long.
Notice that when inflating your board, the valve stem/pin must be in the uppermost position. When deflating your board, the valve stem/pin must be in the down position. The neutral position is for letting in air and out.
Can I Leave My Inflatable SUP Inflated?
You can leave your inflatable stand-up paddle board inflated. For instance, if you are planning to use it anytime soon, it’s best to leave your board inflated than go through the process of manually adding air pressure into your board again. When doing so, here are the following tips to keep in mind:
- Clean your board with mild soap and fresh water before storing your board.
- Dry your board thoroughly.
- Keep it away from direct sunlight.
- Instead of leaving your board rested on the wall, keep it off the ground.
- Keep it away from any sharp objects.
- Avoid placing heavy objects on top of your board.
- Take out at least 5psi of air when leaving inflated.
- Leave the valve cap open to let the air out over time.
Following these guidelines can help protect your inflated paddle board from dents and any potential damage. First, remove a little air pressure from your board to allow the seams to relax.
How Long Can I Leave My SUP Inflated?
Depending on your preference, you can leave your stand-up paddle board inflated for a while. Note, though, that your board may incur damage if this is not correctly stored while inflated. Temperature is a crucial factor as it may cause moisture that will degrade the quality of your board over time.
It is safe to leave your stand-up paddle board inflated, but consider where you are storing it and for how long. The area for storage must be climate-controlled to keep the board away from expensive repairs.
Should I Deflate My SUP?
You should deflate your stand-up paddle board if you don’t see yourself using it in the next few months. Doing this will allow the seams of the board to rest from the air pressure. Remember that temperature can expand air inside your board, which may impair your board if you leave it inflated.
When you deflate your stand-up paddle board, consider storing it in a board bag or, again, a climate-controlled area to keep it from moisture. It will also guarantee the longevity of your board.
How Do You Pack an Inflatable SUP?
You can pack your inflatable stand-up paddle board inflated or deflated. To do this on an inflated board, you will need to clean, dry, and leave it on a surf rack of your car, away from direct exposure to the sun. If you decide to deflate your board, you will need to wash and dry it first. Either roll or fold your paddle board, then store it in a board bag.
When packing a deflated paddle board, our suggestion is to fold your board instead of rolling it. Doing this will prevent any risk of damage to your fin box. If you’d like to roll your board, avoid doing so tightly or too loosely.
How Do You Fold a SUP Isle?
After deflating your ISLE paddle board, you are now ready to fold and store it in place. To do so, follow the steps below to keep your board securely and correctly folded:
- Confirm that your board is clean and dry entirely.
- Begin folding your board from the nose to the tail.
- Fold your board to the same width as your fin box, enough to fit in your bag.
- Avoid adding too much pressure on the board when folding to prevent damage.
- Do not fold the fin box/plates.
- Get your board bag and store your board inside.
If you don’t have a board bag, you can store it as is. But, again, move it away from sharp and heavy objects, and place it in a cool, dry place.
How Do You Roll Up an iRocker SUP?
Before you begin rolling up your iRocker stand-up paddle board, ensure that your board is flat and has no air. Once you’re ready, follow the steps below to roll up your paddle board with ease:
- Confirm that your board is clean and dry entirely.
- Leave the valve stem/pin in the down position to let the air out as you roll.
- Begin rolling your board from the nose to the tail.
- Avoid turning too tightly or too loosely to prevent damage.
- Secure with board straps.
- Store your rolled board into your board-friendly bag.
Remember, give some breathing room to your board. An important tip is to check the quality of your other tools too. It includes your carry strap, your paddle, and even your board.
How Do You Transport a SUP?
You can transport your stand-up paddle board inflated or deflated. One of the reasons why inflatable paddle boards are popular is because of their portability. Here are a few tips when transporting your stand-up paddle board.
- Invest in a board-friendly bag. Board bags have a protective layer with a harness to carry them effortlessly.
- Keep your rolled, folded, or inflated board off the ground to avoid scratches.
- Keep your board away from sharp or heavy objects.
- Make sure your board is clean and dry.
- Consider the temperature in your car. Avoid leaving it in a heated area.
- Invest in a surf rack if traveling with an inflated board.
- If inflated, take a little air pressure out.
Rolling or folding is the most compact and secure way of storing your board. If you don’t have a board bag, it is highly recommended to invest in one. It will be handy and easy for you to store all your paddle boarding–related tools in one place.
Can You Transport an Inflatable SUP Inflated?
You can transport your stand-up paddle board inflated. One important thing to consider is how long your drive is, as prolonged exposure to the sun will damage your board. Before leaving, take out a little pressure from your board to avoid overexpansion due to heat. If it’s a long drive, occasionally stop to check the pressure of your board.
You can carry your inflated board in different ways. It can be through a roof rack, inside your vehicle (if big enough), or a truck bed. But, again, keep your board away from anything abrasive. It will avoid damage to the seams and fins of your board.
How Do I Put a SUP in My Car?
There are different ways to put your stand-up paddle board in your car. For instance, with a deflated board, you can put your board bag in your vehicle, ensuring it’s away from any heated area. If you prefer to leave your stand-up paddle board inflated, consider the guidelines below:
- Invest in a board rack. It can be on the roof of your car.
- You can place your paddle board on the back of a pickup truck.
- If your vehicle is big enough for your board to be stored inside, do so.
- When putting it inside your car, ensure that it’s temperature-controlled.
- When leaving outside your vehicle, release at least 5psi of air to avoid overexpansion.
- When storing outside your automobile, consider how long the drive will be. Check the air pressure of your board often.
- Again, keep your board away from abrasive objects.
Perhaps the most secure way to put your stand-up paddle board in your car is by first deflating your board and storing it in a board bag. It relieves the board of air pressure and keeps it away from sun exposure. Of course, leaving your board inflated is fine too, but make sure you follow the guidelines above.
How Do You Transport a SUP on a Roof Rack?
You can transport your stand-up paddle board on a roof rack. It’s one of the rider’s most preferred ways of transporting their board. Why? Because it eliminates the hassle of deflating your board, especially if you plan to use it for consecutive days. Follow the steps below to transport your SUP on a roof rack:
- Release air pressure from your board of at least 5psi.
- Ensure your board is clean and dry.
- With the center handle, lift your paddle board onto the center of your roof rack.
- Pull on the double straps enough to get it over on the board to the other side.
- Go to the other side, and take one strap, putting it underneath the rack.
- Push the other end through the cam buckle and secure it tightly.
- Wrap the remaining strap around the roof rack and tie it securely.
- Ensure that your board is stable and not moving.
Another advantage of transporting your stand-up paddle board on a roof rack is the convenience of stacking several boards. It saves valuable space for luggage and people inside your car. When doing so, though, make sure you remove the fins to avoid damage.
How Do You Transport a SUP Without a Roof Rack?
You can also transport your stand-up paddle board without a roof rack if you don’t have one. Read through below to check on several ways to do this:
You can use a pickup truck bed
- Lay the bed flatly.
- Ensure that the board’s fins are facing up when laying your board on the bed.
- Strap your board down flatly on the bed.
You can use a soft rack
- A soft rack is a foam pad that you can lay on the roof of your car.
- Place the foam pad on top of your vehicle.
- Place your board on top of the foam pad, facing down, with fins upright.
- The straps go through the door openings and then over the top of your vehicle.
- Secure the strap inside your car and pull it tightly.
You can do a DIY soft rack with pool noodles
- Using pool noodles as your foam block, place them on top of your car evenly.
- Place the board on top, centered on the foam blocks, with the fins upright and at the front end of your vehicle.
- Using a ratchet strap, put the strap over the board to the door openings.
- Hook the strap together inside the car and tighten.
When securing the straps, leave them hooked up inside your car for security. However, don’t leave your board outside for too long. Remember that since your board is outside your vehicle, it’s vulnerable to weather changes and thieves.
How Do I Lock My SUP to My Car?
Having a paddle board lock is absolutely necessary. Purchasing a lock makes sure that your board is safe wherever you go, most especially in cases where you need to leave it unattended. To learn how to lock your paddle board in your car, read through the steps below:
- Take your paddle board lock, and press the ring on the top to expose the jaw and allow them to open.
- Attach the jaw to your board’s leash plug/D-ring. Once attached, the ring will go upright.
- Run the cable through the ring and the car’s board rack.
- Attach the cable to the combination lock.
- A helpful tip is to consider the length of the paddle lock you are buying to see if you can secure multiple boards.
- Another suggestion is to get a paddle lock that is rust and abrasive resistant for extended use.
Paddle boards are expensive, and you wouldn’t want your board to be in anyone’s reach other than you. Your paddle board lock will protect your board and won’t damage it in any way. They are compatible with any board that has a leash plug/ D-ring.
How Do You Carry a SUP and a Kayak?
Carrying your stand-up paddle board and kayak is easy. With the correct technique, you can lift your board by yourself. To know how to lift a stand-up paddle board and a kayak, follow the steps below:
Carrying a Stand-Up Paddle board:
- Begin by standing the board on its side, with the carry handle facing out, the nose pointing forward, and the tail at your back.
- Bend your knees and reach for the carry handle on the center of your board.
- Lift your board, and keep your back straight as you walk towards your destination.
Carrying a Kayak:
- Begin by placing your kayak on the ground with the cockpit facing up.
- Bend your knees and place both hands on the cockpit rim towards your chest.
- While keeping your knees bent, slide the kayak up to your thighs.
- With your right hand, take the opposite side of the rim.
- Stand up as you lift the right side of the rim onto your shoulder.
- Position the kayak accordingly to remain balanced.
Carrying a Stand-Up Paddle board and Kayak on a Roof Rack:
- J Cradles and Stackers are a great way to attach to your roof rack.
- J cradle will hold your kayak on the side to free up space on the roof. You can then place your paddle board on the top of your car.
Carrying your stand-up paddle board and kayak is effortless with the correct technique and with the help of extra equipment. If you wish to lift both on your car but don’t want to stack them together, invest in a J Cradle so you can put your kayak on the side.
Can You Store an Inflatable SUP Inflated?
The answer is yes. You can store a stand-up paddle board inflated. Here are a few things you need to consider when doing so:
- Rinse your board with clean water and dry it thoroughly before storage.
- Avoid using abrasive soap when washing your board, as the harsh chemicals may corrode your board.
- Store your paddle board at the right temperature, away from sunlight and rain.
- Avoid stacking objects on top of your board.
- Keep your board away from sharp objects.
- Avoid storing your board in a compact space.
- Store your board laying flat, off the ground.
- Remove the detachable fins and store them properly.
- Release at least 5psi of air and remove the valve cap to let the air out.
- Be wary of rodents and insects that may chip on your board.
Following the guidelines above will help prolong the life of your board. It is safe to store your inflated board, but consider different factors that may risk damage over time.
How Do You Store a SUP in a Garage?
One of the best places to store your stand-up paddle board is in your garage. It protects your board from direct sun exposure and rain. You need to make sure that your board is off the ground at all times. Here are a few ways to store your stand-up paddle board in your garage:
- Store your board on a rack: Invest in a rack that is specifically designed to hold your paddle board. If you have a rack at home, ensure that you add padding or straps to carry your board gently.
- Store your board leaning against a wall: As mentioned, you should keep the board off the ground. If you prefer to lean it against the wall, add padding on the floor with the nose pointing upwards or the board on its side.
- Store your board suspended on the wall or ceiling: If you don’t have a rack, you can invest in a rafter that will help pull your board up on the ceiling. It is an ideal way of keeping your board away from sharp and hard objects.
- Deflate your paddle board: If you’re not using your board for several months, deflate your paddle board and store it in a board bag. It is also fitting as it won’t take a lot of space in your garage.
When storing your board, remove the detachable fins to prevent damage. Pay special attention to the length of your board and how heavy it is. Recognize which option is best for you depending on those two factors.
Can I Store My SUP Outside?
Yes, you can store your stand-up paddle board outside. Be wary of the several factors that may affect your board if this is your preferred way of storage. That includes bacteria, mold, and exposure to different weather and temperature conditions. All of these can damage the durability of your board and shorten its life.
When storing your board outside, ensure that your board is off the ground and on a shaded area. Using a free-standing rack is highly recommended. In addition, keep your board secure from theft by using a paddle lock.
How Do You Store a SUP for the Winter?
Storing your stand-up paddle board inside the house or in your garage is the best way to keep it away from the harsh conditions that winter brings. Follow the guidelines below to store your stand-up paddle board during the winter season:
- Find an area with a controlled temperature.
- Install a rack on the wall or the ceiling, depending on your preference.
- Place your paddle board on the rack of your choice.
- Avoid placing heavy items on top of your board.
- Be wary of rodents and insects that may degrade the quality of your board.
If you don’t have a place to store your board other than outside, find a shaded area. Put your board on a free-standing rack and cover it with a waterproof tarp.
How Do You Store an Inflatable SUP for Winter?
If you have an inflatable stand-up paddle board that you’d like to store in the winter season, you can do so while it is inflated or deflated. Read through the guidelines below to do this:
Inflated Paddle boards
- Find a temperature-controlled area to store your board.
- Invest in a rack of your choice.
- Ensure that your board is dry and clean and the fins detached.
- Place your board on the rack while avoiding sharp or heavy objects.
- Avoid storing your board in a compact space.
- Keep the valve cap open and release at least 5psi of air.
Deflated Paddle board
- Ensure that your board is dry and clean, with the fins detached.
- Place your board inside a board bag.
- Find a temperature-controlled area to store your board.
- Avoid storing your board in a compact space.
Storing your board outside is not a good idea during the winter season. It can significantly enhance the risk of ruining your board. Just as your board is vulnerable to heat, it is also weak to extreme cold.
How Do You Fix a Hole in a SUP?
Most of the stand-up paddle boards on the market come with a repair kit. It will allow you to fix your board immediately if you see holes or any minor damages. If you want to know how to fix a hole in your paddle board, follow the steps below:
- Begin by finding the leak. Do this as you wipe your board with soapy water.
- Clean the area of the hole and let it dry.
- Prepare the patch that you’ll use to cover the hole. Then, cut it big enough to cover the entire hole.
- Apply glue on the side of the hole and the patch.
- Place the patch on top of the hole.
- Let it dry for at least 24 hours.
- Smoothen the area and clean excess glue.
If the hole is too big or you’re not comfortable enough to do it yourself, go to a board shop instead. It may cause extra money, but this will ensure that your board is fixed well by a professional.
How Do You Repair an Inflatable SUP Seam?
It can be overwhelming to repair a seam on your board on your own, but it’s always a good idea to learn how. It’s also important to note that once you find that your board needs repair, don’t use it in the water again. Read through below for steps on how to repair the seam of your paddle board:
- Begin by deflating your inflatable paddle board.
- Locate the seam in need of repair, and clean the area and let it dry.
- Using the repair glue, apply a layer to the seam.
- Let it dry for 20 minutes, and apply another layer on the seam again.
- Let it dry again for another 20 minutes, and continue to put the last layer on the seam.
- Let it dry for at least 24 hours.
- Smoothen the area and clean excess glue.
When you receive your paddle board for the first time, notice if it has a repair kit with it. If there’s none, it is recommended that you purchase one on a board shop or online. Also, never hesitate to reach out to a professional for advice on repairing your board.
How Do You Care For a Fiberglass SUP?
Your paddle board is rigid and durable, but it doesn’t mean that it’s not vulnerable to several factors like the weather and abrasive objects. To learn how to care for a fiberglass stand-up paddle board, follow our maintenance tips below:
- Be wary of sun exposure. Heat can affect the durability of your fiberglass and break it.
- Keep your paddle board try. Doing this will prevent bacteria, mold, and mildew from forming.
- Always take off the fins after paddle boarding.
- Repair any minor damage such as ding, scratches, or holes as soon as possible. The sooner it’s repaired, the better.
- Use a board bag when storing your board. Board bags have a protective layer that adds to your board’s security.
- Rinse your board with mild soap and wash with fresh water.
- Open the valve cap when storing to let the air out continuously.
- At least once a year, lubricate all-metal pieces of your board to prevent rusting.
Your stand-up paddle board requires constant maintenance to prolong its life. A well-cared-for paddle board means that you can maximize its performance better and use it longer.
How Do You Fix a Broken SUP Paddle?
Your current paddle broke, and you may be wondering if you need to buy a new paddle. Don’t worry, as you can fix your paddle and make it as if it’s brand new. Read through the steps below to fix the paddle of your stand-up paddle boards:
- Get a carbon tube that is the same diameter as your paddle.
- Prepare your epoxy resin, epoxy hardener, tape, saw, sandpaper, and gloves.
- Use your tape to make the end of the broken parts.
- With the tape as your guide, use the saw the cut the broken ends.
- Use a saw to make a 0.5 cut lengthwise on the carbon tube.
- Sand the carbon tube.
- Prepare the resin by mixing epoxy resin and epoxy hardener.
- Connect the carbon tube and the other tube by gluing half of the carbon tube. Let it dry for at least 6 hours.
- Do the same to the other side of the carbon tube. Tape the two parts together and let them dry again for 6 hours.
- Your paddle is ready to go!
Your paddle will be as if it’s brand new by following the steps above. If you feel uncomfortable, you can always go to your trusted repair shop for professional help. Now that you know how to set up, store, transport, and fix your paddle board, you are good and ready to go!