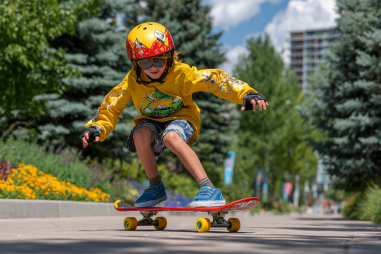
Skateboarding is more than just a sport or a hobby—it’s a powerful form of self-expression. One of the best ways to stand out and truly own your skateboarding journey is by customizing your gear. Whether it’s your deck, helmet, or pads, personalizing your equipment allows you to showcase your unique style and creativity while also making your gear unmistakably yours. Ready to dive into some cool ways to customize your setup? Let’s explore how you can make your skateboard gear a reflection of your personality and passion.
Why Customize Your Skateboarding Gear?
Customizing your skateboarding gear does more than just make it look cool—it’s about creating a deeper connection with your equipment. When your gear feels personal, it can boost your confidence and motivation at the skatepark. Plus, it helps differentiate you from other skaters, giving you a unique edge.
Another practical benefit is that customization can make it easier to spot your gear among others, especially in busy skateparks or group sessions. And in some cases, customization can even improve the grip or protective qualities of certain items.
Ultimately, customizing your gear is an expression of your identity and creativity, making skating not just an activity but an art form tailored by you.
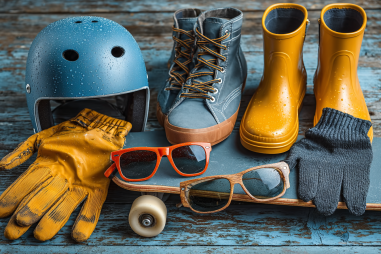
Popular Customization Options: Decks, Helmets, Pads
When it comes to personalizing your skateboarding equipment, there are several popular starting points.
Decks
The skateboard deck is the canvas for most customization projects. From vibrant paint jobs and graphic designs to grip tape art, decks offer endless possibilities to express yourself. Many skaters opt for hand-painted designs, custom stickers, or even laser-etched graphics. You can also replace your grip tape with colored or patterned options to add extra flair.
Helmets
Helmets not only serve a critical safety purpose but also offer creative spaces for self-expression. You can customize helmets with stickers, paint, or decals. Some DIY artists use waterproof markers or vinyl wraps to create unique patterns and visuals. The key is to personalize while maintaining the helmet’s protective qualities.
Pads and Other Gear
Leave no stone unturned—pads (knee, elbow, wrist) can be customized as well. Adding patches, fabric paint, or small decals can make these pieces stand out. Even your skate shoes and apparel can be customized with unique designs or colorways matching your overall setup.
Tools and Supplies Needed for Customizations
Before you get started, it’s helpful to gather the right tools and supplies. Depending on the customization method you choose, the following items may be necessary:
- Sandpaper or grip tape razors (for prepping your deck)
- Spray paints, acrylic paints, or paint markers
- Clear sealant spray to protect your artwork
- Custom grip tape or colored grip tape sheets
- Paintbrushes in various sizes
- Stencils or masking tape for clean lines and shapes
- Stickers, patches, or vinyl decals
- Protective gloves and a mask (if working with spray paint)
- Waterproof markers and sharpies
Having these tools on hand helps you achieve smooth, professional-looking results and protects your gear and skin during the process.
Step-by-Step Guide to Personalizing a Skateboard Deck
Customizing your deck can seem intimidating at first, but breaking it down into manageable steps makes it fun and rewarding. Here’s a basic guide to get you started:
1. Remove Old Grip Tape and Clean the Deck
If you’re changing your grip tape or working on the top of the deck, start by carefully removing the old grip tape with a razor blade. Clean the deck’s surface thoroughly with rubbing alcohol to strip away dirt and oils.
2. Lightly Sand the Surface
Sanding the deck lightly will help the paint or adhesive stick better. Use fine-grit sandpaper for an even finish.
3. Plan Your Design
Sketch your design on paper or visualize it beforehand. Use stencils or masking tape on the deck for clean, precise shapes or patterns.
4. Paint and Decorate
Use acrylic paint or paint markers to apply your design. If you prefer using stickers or decals, make sure the deck surface is dry and clean before application.
5. Add Grip Tape (Optional)
If you want customized grip tape, you can apply colored or pre-designed grip sheets. Otherwise, standard clear grip tape can be laid over your paint to protect it.
6. Seal Your Artwork
Once the paint or design is dry, spray a clear sealant to protect your custom work against scratches and weather.
7. Let it Cure
Allow ample time for your deck to dry and cure before riding—usually 24 to 48 hours.
Safety Considerations During Customization
While customizing your skateboarding gear is exciting, safety should never be overlooked. Here are some tips to stay safe throughout your project:
- Work in a Well-Ventilated Area: Use spray paints and sealants outdoors or in well-ventilated spaces to avoid inhaling fumes.
- Wear Protective Gear: Gloves, masks, and eye protection are important, especially when sanding or spraying paint.
- Check Gear Integrity: Before applying any modifications, make sure the structural integrity of your equipment isn’t compromised.
- Avoid Thick Layers: Excessive paint or modifications on helmets and pads can reduce their protective effectiveness.
- Use Non-Toxic Materials: Choose paints and adhesives that are safe for your skin and the environment.
Inspiring Ideas and Trends in Skateboarding Customization
Looking for some inspiration? Here are a few trends and ideas that skaters are loving right now:
- Hand-Painted Artwork: Custom illustrations and graffiti-style art on decks are timeless and highly personal.
- Retro and Vintage Logos: Bringing back classic skate brands’ logos or retro color schemes offers nostalgic vibes.
- Glow-in-the-Dark Grip Tape: Perfect for night sessions and added cool factor.
- Mixed Media: Combining paint, stickers, and even fabric patches for a collage effect.
- Personal Branding: Using custom logos, names, or insignia to build your own skate identity.
- Environmental Themes: Using eco-friendly materials and designs that highlight sustainability and nature.
Keeping these trends in mind can spark ideas that make your gear stand out while reflecting what matters to you.
Making Your Skateboarding Gear Truly Yours
Customizing your skateboarding gear merges function with style in an exciting way that enhances your entire skateboarding experience. It allows you to infuse your personality, creativity, and passion right into your equipment, making every session at the skatepark more meaningful and fun.
Remember, your gear should be a reflection of who you are, not just in looks but also in durability and safety. So take your time, plan your designs, and enjoy the process of turning your standard setup into something uniquely yours. When your gear truly speaks to your style, it can inspire you to push harder, skate longer, and embrace your skateboarding journey with authentic flair.