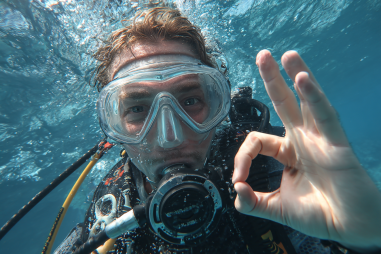
Underwater photography is a captivating art that allows divers to capture the vibrant and diverse life beneath the waves. However, one of the biggest challenges photographers face when shooting underwater is controlling the lighting. Water absorbs and scatters light differently than air, dramatically affecting how colors and details appear in your photos. Mastering underwater photography lighting for scuba diving not only enhances the image quality but also brings out the stunning true colors and moods of your subjects. In this guide, we’ll explore the challenges of natural light underwater, the best lighting equipment, practical techniques for positioning and balancing light, and important safety tips—all to help you perfect your underwater shots.
Challenges of Natural Light Underwater
Natural light changes significantly as it penetrates water. Unlike shooting on land where sunlight reaches subjects directly, underwater light behaves in complex ways. Water absorbs the red, orange, and yellow wavelengths of light first, leaving mainly blue and green hues as you descend deeper. This absorption begins almost immediately below the surface, meaning colors start to fade and images turn bluish or greenish. Additionally, water scatters sunlight, which causes a loss of contrast and sharpness.
Another challenge is the angle and intensity of sunlight, which fluctuate with weather, time of day, and water clarity. Early morning or late afternoon light may be softer and warmer, but at midday, light can be harsh and create strong shadows or glare. Particles suspended in the water can further scatter and diffuse light, reducing visibility and making it harder to capture clear images.
Because of these issues, relying solely on natural light limits your ability to capture true colors and fine details underwater. That’s where artificial lighting becomes a valuable tool to enhance your photos.
Types of Underwater Lights: Strobes, Video Lights, and Continuous Lighting
Understanding the different types of underwater lighting equipment is essential for effective scuba photography. Each type of light serves unique purposes and contributes differently to the photo’s overall look.
Strobes
Strobes are powerful flashes of artificial light designed specifically for underwater photography. They produce a quick burst of light that helps restore the lost color spectrum, particularly reds and warm tones, resulting in vivid, natural-looking images. Strobes freeze motion as well, reducing blur caused by water movement or subject motion.
Most underwater photographers carry one or two strobes attached to arms on their camera housing. Dual strobes give better coverage and balanced lighting, helping to reduce harsh shadows and backscatter (light reflecting off particles in the water).
Video Lights
Video lights provide continuous illumination rather than a single flash. They are essential for shooting video underwater but are also increasingly popular with photographers who want consistent and adjustable lighting. High-power LED video lights can brighten scenes nicely, especially at mid-range depths.
Continuous lighting gives you more control to see how shadows fall and how colors render in real time, offering greater creative flexibility.
Continuous (Constant) Lighting
Similar to video lights, continuous or constant light sources allow photographers to see how light interacts with their subject while composing the shot. These lights are less intense than strobes and can be used as accent lights or to supplement strobes in low-light conditions.
Choosing between strobes and continuous lighting often depends on your shooting style and subjects. Many photographers use a combination for the best results.
Positioning Lights for Optimal Illumination
How you position your lights makes a big difference in the quality of your photos. Incorrect placement can cause backscatter, unnatural shadows, or flat lighting. Here are some tips for proper lighting setup:
- Angle your strobes slightly outward: Position your strobes at about 45 degrees from your camera lens axis. This helps illuminate the subject evenly while minimizing light reflecting straight back into the lens.
- Keep strobes away from particles: The closer your strobes are to your camera lens, the more likely particles in the water will cause backscatter. Using arms to spread the strobes apart improves light spread and reduces unwanted reflection.
- Experiment with height: Adjust the vertical positioning of your lights. Sometimes placing lights slightly above or below the subject creates more natural shadows and depth.
- Continuous lights: Use small adjustable mounts or flexible arms to direct video lights precisely. This is helpful for macro diving or shooting complex sceneries where you want to highlight texture and detail.
Practice makes perfect—take time to test different setups and review your shots, adjusting angles and distance until you achieve the desired effect.
Balancing Ambient and Artificial Light
Balancing the natural ambient light with your artificial light is key to producing balanced and realistic underwater images. Ambient light sets the overall tone and background, while your strobes or video lights highlight the subject.
When shooting at shallow depths during bright daylight, ambient light is strong, and your strobes should be balanced to avoid overexposing the subject. To do this, reduce the power settings on your strobes or increase camera shutter speed to control the overall exposure. At greater depths or in dim conditions, rely more on your artificial lights, as ambient light diminishes quickly.
One technique to balance lighting is to adjust your camera’s white balance. Many photographers prefer to shoot in RAW format so they can fine-tune colors during post-processing. Experimenting with different strobe intensities and ambient light settings allows you to freeze the vibrant colors in motion and create images that feel natural and alive.
Lighting Techniques for Different Depths and Conditions
Lighting underwater is highly dependent on depth and water conditions, so adapting your technique is vital:
Shallow Water (0-10 meters/0-33 feet)
At shallow depths, much of the sunlight is still present, so your artificial lights should supplement rather than overpower ambient light. Using strobes or video lights at lower power settings can enhance contrast and bring out colors without creating unnatural lighting.
Mid Depth (10-30 meters/33-100 feet)
This is where natural light falls off rapidly, and artificial lights become crucial. Increase strobe intensity or use brighter video lights to restore warm colors and prevent images from looking bluish or monochromatic. Position lights carefully to reduce shadows caused by declining ambient light.
Deep Water (30 meters/100 feet and below)
At these depths, ambient light is very weak. Your lights will need to do most of the work. High-powered strobes and continuous lights are essential to illuminate your subjects effectively. Because visibility can be limited, avoid over-lighting the background, which can cause backscatter and noise.
Different Water Conditions
- Clear water: More ambient light penetrates, so balance your strobes accordingly and avoid harsh lighting that might wash out the scene.
- Turbid or particulate-rich water: Use lower strobe power and angle strobes carefully to minimize backscatter from suspended particles.
- Cave or wreck dives: Continuous lights help illuminate large areas and dramatic shadows. Combine with strobes to highlight specific subjects within the gloomy environment.
Safety Tips When Using Lighting Underwater
While underwater lighting equipment greatly enhances photography, there are important safety considerations to keep in mind:
- Check equipment seals: Always ensure your strobes and video lights are properly sealed to avoid leaks that could cause damage or malfunction.
- Manage cables and arms: Secure connections and flexible arms to prevent snagging on underwater obstacles or marine life.
- Avoid startling marine animals: Bright flashes and continuous light can disturb sensitive species. Use lighting judiciously and be aware of your surroundings.
- Maintain good buoyancy control: Using lighting equipment can change your center of gravity and balance. Practice neutral buoyancy to avoid damaging the reef or stirring up sediment that affects visibility.
- Have a buddy system: Coordinate with your dive buddy when handling lighting gear to ensure safety and prevent entanglement.
Always follow manufacturer instructions and conduct pre-dive equipment checks to ensure everything functions optimally during your dive.
Bringing Your Underwater Photos to Life
Lighting is the heart of stunning underwater photography. By understanding the unique challenges of light underwater and employing the right gear and techniques, you can transform your photos from dull and monochromatic to vibrant and dynamic. Experiment with strobes, video lights, and continuous lighting setups; position your lights carefully; and adjust power settings depending on depth and water clarity. Remember to balance ambient and artificial light thoughtfully, keep safety in mind, and practice often.
With patience and dedication, you’ll be equipped to capture breathtaking underwater scenes that showcase the true beauty of the ocean’s mysterious world.