Skateboarding photography captures the exhilarating blend of skill, style, and movement inherent in the sport. One of the most crucial factors influencing the success of these images is lighting. Whether it’s the warm glow of the setting sun or the controlled illumination created by artificial lights, understanding how to manipulate light can dramatically enhance your skateboarding shots. In this article, we’ll explore several lighting techniques that will help you emphasize dynamic tricks, highlight textures, and create mood, making your skateboarding photos truly stand out.
Utilizing Golden Hour and Natural Sunlight
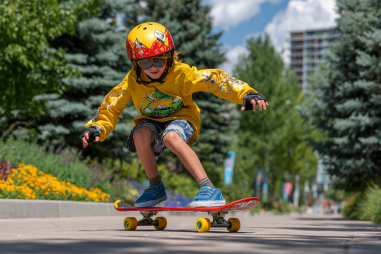
The golden hour, which occurs shortly after sunrise and before sunset, is a photographer’s favorite time to shoot. The sunlight during this period is softer, warmer, and more diffused compared to the harsh midday sun. When photographing skateboarding, the warm tones and the elongated shadows created during the golden hour add depth and drama to your images.
To make the most of golden hour lighting, position your skater so that the sun is either directly behind or at a slight angle. This setup creates natural rim lighting around the skateboarder, emphasizing their movement while adding a beautiful halo of light. Additionally, shooting with the sun behind you helps illuminate the skater’s face and board with a pleasing soft light.
If you are shooting in full daylight, try to find open shade or use nearby elements like buildings or trees to block direct harsh sunlight. Open shade offers even lighting and reduces squinting, making it easier to capture crisp action shots without the distraction of blown-out highlights or harsh shadows.
Using Fill Flash and Diffusers
While natural light forms the foundation of many outdoor skateboarding photos, adding fill flash can help balance shadows and bring clarity to darker areas. Fill flash is especially helpful when the sun is high, and shadows tend to be sharp and distracting.
Using a fill flash involves firing a light source at a lower intensity than the ambient light to brighten shadowed parts without washing out the image. This technique allows you to maintain natural lighting ambiance while ensuring that important details—like a skater’s facial expression or the design on the skateboard—are visible.
Diffusers play a crucial role in softening both natural and artificial light. A diffuser is any translucent material that spreads and softens harsh light, preventing the sharp, unflattering shadows that often occur during midday shooting. Portable diffusers, such as collapsible translucent panels or even a white sheet, can be positioned between the sun and your subject to create more gentle light.
Creative Use of Backlighting and Silhouettes
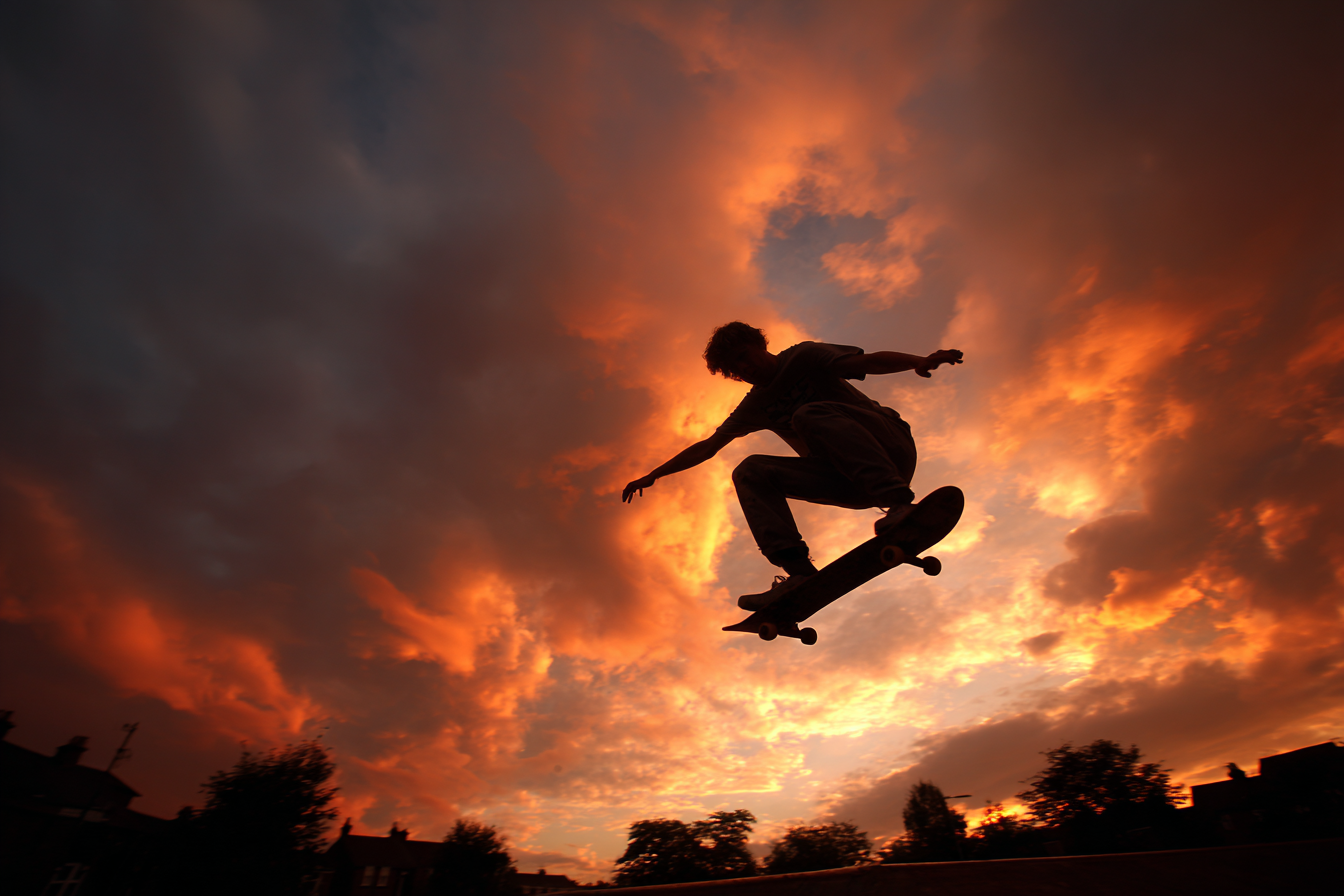
Backlighting is a powerful technique in skateboarding photography. By positioning the light source behind the skater, you can create a striking outline or rim light that separates your subject from the background. This technique works exceptionally well during sunrise or sunset but can also be reproduced with artificial lighting.
Backlighting can also be used to create silhouettes, which inject a dramatic, artistic element into your shots. To achieve effective silhouettes, expose for the brightest part of the scene (usually the background), causing the skateboarder to appear dark and shadowed but with defining shapes. This style plays up the dynamic pose and form of tricks, producing strong visual impacts.
Keep in mind that shooting into the sun requires careful metering to avoid lens flare that may distract from the subject. However, a bit of controlled lens flare can sometimes add a cool, dreamy vibe to your skateboarding photos.
Night Photography and Artificial Lighting Setups
Shooting skateboarding at night opens up a completely different realm of creative possibilities but requires mastering artificial lighting. Since ambient light is minimal, you’ll need external light sources to properly illuminate your subject.
There are several artificial lighting options for night skateboarding photography:
- Continuous LED panels: Provide steady light, making it easier to adjust framing and focus in real-time.
- Off-camera flash or strobes: Deliver powerful bursts of light great for freezing action. Combining multiple flashes from different angles can add dimension by creating highlights and shadows.
- Portable spotlights or handheld torches: Useful for creative effects like light painting or highlighting specific parts of the scene.
When setting up lights at night, position them to highlight the skater’s movement while avoiding flat, unflattering lighting. Side lighting or dynamic angles help sculpt the subject and reveal textures like concrete and wood grain. Try experimenting with gels (colored light filters) to add mood or vibrancy to your shots.
Tips for Minimizing Harsh Shadows
Harsh shadows can detract from the aesthetic and clarity of skateboarding photos. The goal is to balance light so shadows don’t obscure key details or create distracting patterns on your subject.
To minimize harsh shadows:
- Use reflectors: These can bounce natural or artificial light into shadowed areas, softening contrasts.
- Position your light sources carefully: Avoid placing a single light source too close and directly to one side of your subject.
- Diffuse your light: As mentioned earlier, diffusers scatter light rays for even coverage.
- Shoot in softer lighting conditions: Overcast days provide natural diffusion, making shadows much less prominent.
By combining these tips, you can achieve balanced, well-lit images that showcase the skateboarder’s moves without distracting dark patches or blown-out highlights.
Combining Lighting Techniques for Dramatic Effects
Mastery in skateboarding photography often comes from blending multiple lighting approaches to produce striking, memorable images. For example, you might combine backlighting from the setting sun with an off-camera fill flash to both silhouette and illuminate the skateboarder.
Or during a night session, mix strobes with ambient street lights to create a layered effect that enhances the urban atmosphere while still capturing action clearly.
Experiment with layering natural and artificial lights, different flash angles, gel colors, and exposure settings to fine-tune the mood and drama of your shots. Don’t hesitate to try unconventional setups; some of the best skateboarding photos break traditional rules while maintaining strong lighting fundamentals.
Practical Examples and Case Studies
Consider a photographer capturing a kickflip during the golden hour. By positioning the skater so that warm light grazes their side, the photographer combines soft edge lighting with pinpoint illumination on the board’s movements. A subtle fill flash ensures the skater’s face remains visible, preventing it from being lost in shadow. The resulting photo balances motion, light, and mood.
In a night skateboarding session, a photographer might use a pair of off-camera strobes—one at camera right for key lighting and one behind the skater as a rim light—while the natural glow of nearby street lamps enhances the urban environment. By synchronizing flashes with high shutter speeds, they freeze the trick mid-air, giving the photo sharpness and depth.
Another example is utilizing backlighting during an overcast day. The soft light from the cloud-filtered sun behind the skateboarder creates a halo effect around the figure, highlighting motion and adding an ethereal quality to the photo.
Every skateboarding shoot will present unique challenges and opportunities. By applying and combining the lighting techniques discussed here, photographers can adapt to various conditions and produce visually compelling images that capture the passion and energy of skateboarding.
In skateboarding photography, light isn’t just illumination—it’s a storytelling tool. By mastering natural and artificial lighting techniques, you can seize moments with clarity, drama, and emotion. Embrace experimentation, harness the available light, and let your images showcase the essence of skateboarding in all its dynamic glory.