Skateboarding photography is a dynamic and thrilling way to capture the energy, style, and skill of skateboarders in action. But taking the perfect shot is just half the battle—the real magic often happens in post-processing. Editing your skateboarding photos helps highlight the movement, sharpen the details, and enhance the overall mood, making your shots stand out and tell a more compelling story. Whether you’re a beginner learning the ropes or a seasoned photographer looking to refine your technique, understanding how to edit skateboarding photos effectively can elevate your work to the next level.
Recommended Photo Editing Software
Before diving into editing techniques, choosing the right photo editing software is essential. There are various options that cater to different skill levels and budgets:
- Adobe Lightroom: Popular among photographers for its user-friendly interface and powerful editing tools, Lightroom excels in batch processing and color grading, making it a top choice for skateboarding photos.
- Adobe Photoshop: Ideal for advanced edits, especially when you need detailed retouching or creative effects beyond basic adjustments.
- Capture One: Favored by professionals for its excellent color handling and tethered shooting capabilities.
- Free alternatives: Programs like GIMP and Darktable offer robust editing features without the cost, great for beginners experimenting with their editing style.
Choosing software comes down to your specific needs and comfort level. Lightroom is typically the best starting point for most skateboarding photographers because it balances ease of use with professional-grade tools.
Basic Adjustments: Exposure, Contrast, and Clarity
Once your photo is imported into your chosen editing platform, the first step is to make basic adjustments that set the foundation for a great image.
- Exposure: Skateboarding often takes place outdoors with varying light conditions. Adjusting exposure ensures your shot isn’t too dark or too bright, preserving the skateboarder’s action and details.
- Contrast: Adding contrast helps your image pop by making the darks darker and the lights lighter, enhancing textures like the grip tape and clothing folds.
- Clarity: This enhances midtone contrast, which sharpens details and adds depth to the skateboard deck, concrete, and even the skater’s expression, making the image feel more vivid and intense.
These basic tweaks create a solid base for your photo so you can start emphasizing the unique elements of skateboarding.
Enhancing Motion with Blur Effects
One of the defining traits of skateboarding photography is capturing motion—whether it’s a trick, slide, or jump. While freezing action with fast shutter speeds is common, you can also use blur effects creatively to convey speed and fluidity.
- Motion Blur: Applying selective motion blur to the background or wheels can emphasize movement without losing sharp focus on the skater’s face or trick execution.
- Radial Blur: This effect can simulate spinning or rotation, perfect for tricks like kickflips or spins.
- Zoom Blur: Creates a dynamic energy pulling the viewer’s eye toward the subject, ideal when the skateboarder is moving toward or away from the camera.
These effects should be used subtly to avoid overpowering the image. When done right, motion blur can turn a good action shot into a visual story of speed and excitement.
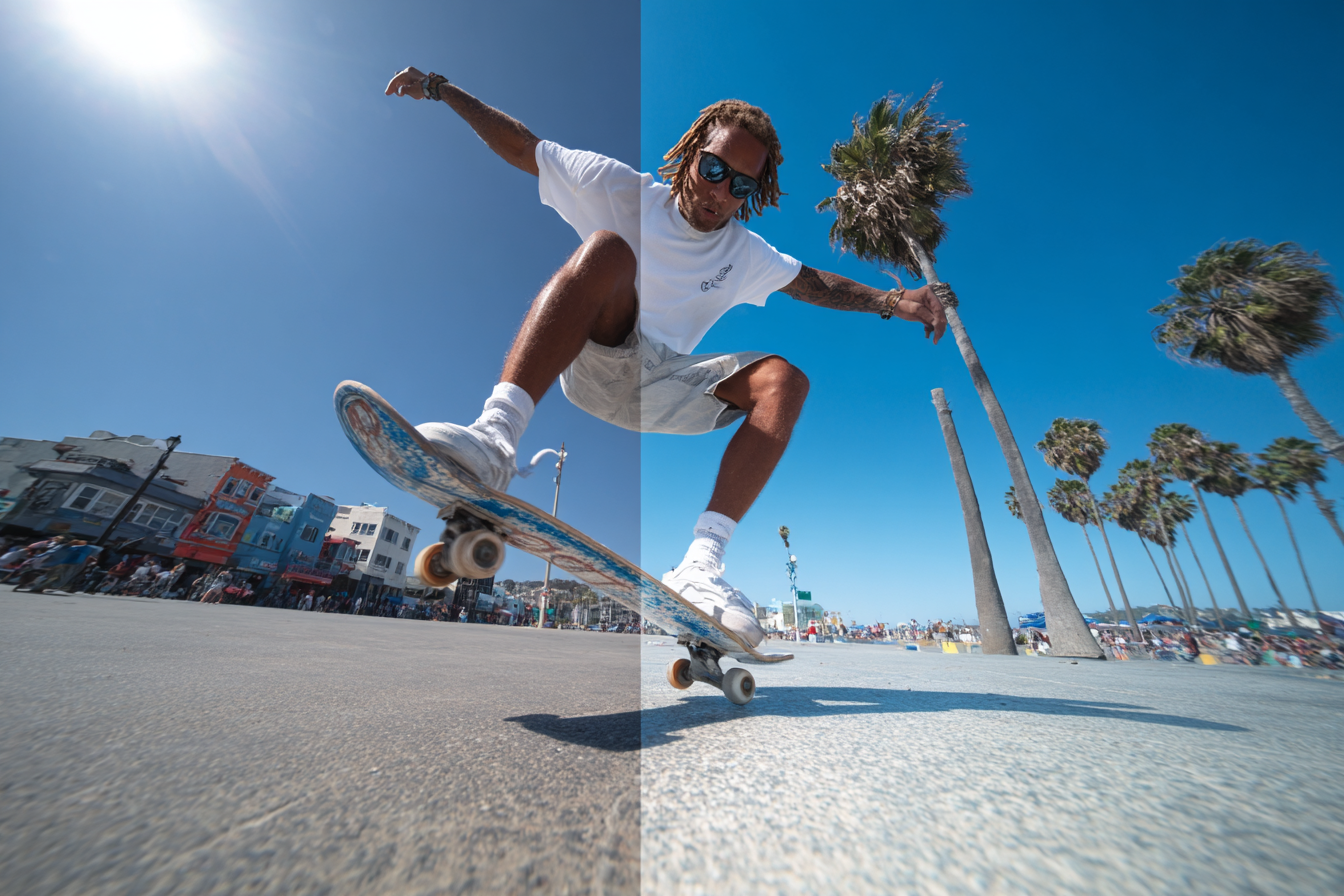
Color Grading to Set the Tone
Color grading is a powerful tool that influences the mood of your skateboarding photos. Different color schemes evoke different feelings:
- Warm tones: Oranges, reds, and yellows can give a vibrant, energetic vibe typical for sunny days and urban street skating.
- Cool tones: Blues and greens produce a moody, gritty atmosphere, which works well for night shoots or indoor skateparks.
- Desaturated or monochrome: Black and white or muted colors highlight contrast and texture, drawing focus to form and movement while giving the image a timeless feel.
Tools like split toning or LUT (Look-Up Table) presets in Lightroom and Photoshop streamline this process, allowing you to experiment with different moods until you find the perfect balance.
Removing Distractions and Noise Reduction
Skateboarding locations can be cluttered with distractions like trash, signposts, or random people. Cleaning up these elements improves focus on the subject and maintains a professional look.
- Spot Healing and Clone Stamp: Use these tools in Photoshop to remove unwanted objects, blemishes, or dirt spots on the lens or sensor.
- Content-Aware Fill: Automatically replaces selected areas with a natural-looking background, ideal for patching up busy skate spots.
- Noise Reduction: Especially in low light or high ISO shots, noise (graininess) can reduce image quality. Lightroom offers noise reduction sliders that smooth out grain without losing important details.
Cleaning your image allows the skater and their trick to remain the center of attention.
Tips for Batch Editing Skate Photos
Skate sessions often result in hundreds of photos. Editing each one individually would be incredibly time-consuming. Here are tips to speed up the process without sacrificing quality:
- Create presets: Tools like Lightroom let you save your favorite combination of adjustments as presets, which can then be applied to multiple photos with one click.
- Sync edits: After editing one photo, sync those settings across other shots taken in similar lighting and environments.
- Cull first: Quickly go through your photos and mark the best shots before batch editing to focus your efforts on images that truly stand out.
- Export settings: Adjust export preferences such as resolution and file format to suit your target platform, ensuring consistency in your final portfolio or social media feed.
Batch editing is essential for maintaining efficiency while still delivering impressive results.
Exporting and Sharing Edited Photos
Once your photos are perfectly edited, it’s time to share your work with the world. Exporting correctly ensures your photos look great on any platform:
- File format: JPEG is best for online sharing because it balances quality and file size, while TIFF or PNG might be preferred for print.
- Resolution: For Instagram or web use, 72-150 dpi is sufficient. For printing, aim for 300 dpi.
- Color space: sRGB works well for digital displays, maintaining accurate color across most devices.
- Watermarking: Consider adding a subtle watermark or logo to protect your work, especially when sharing on public platforms.
Regularly sharing your photos on social media, skate blogs, or photography forums helps build your reputation and connect with the skateboarding community.
Editing skateboarding photos is both an art and a skill that complements your photography. By mastering exposure adjustments, motion effects, color grading, and cleanup techniques, you can transform ordinary skate shots into captivating images that reflect the passion and adrenaline of the sport. Experiment with different software tools and develop your own editing style to truly let your work stand out and inspire fellow skaters and photographers alike.