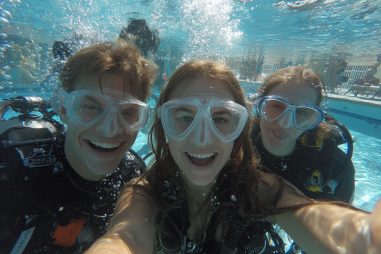
Underwater photography is an exhilarating way for advanced technical scuba divers to document the breathtaking beauty and mysterious realms beneath the waves. However, capturing stunning images in technical diving environments—often characterized by great depths, low visibility, and limited light—requires more than just basic photography skills. It demands an understanding of specialized equipment, lighting techniques, buoyancy control, and post-processing approaches. Whether you’re exploring deep wrecks, caves, or remote ocean trenches, mastering these tips can elevate your underwater imagery from good to extraordinary, making every dive a memorable visual story.
Choosing the Right Camera and Housing for Deep Diving
When venturing into technical diving that extends beyond recreational limits, selecting an appropriate camera and housing is crucial. Depth ratings for equipment become a fundamental concern—your setup must reliably withstand high-pressure environments, often beyond 100 meters.
DSLRs and mirrorless cameras with interchangeable lenses offer unparalleled image quality and flexibility but require sturdy, purpose-built housings that match your dive depth. These housings not only ensure waterproof integrity but provide access to camera controls, buttons, and dials while underwater. Look for housings made from durable materials such as aluminum or polycarbonate that specify depth ratings aligning with your dive profiles.
For those prioritizing mobility and convenience, high-end compact cameras designed for underwater use can be a practical choice, though they may have limitations in sensor size and lens options. Whichever camera system you prefer, test your housing rigorously before deep technical dives to confirm proper sealing and function. Investing in a reliable setup minimizes risks of equipment failure during challenging dives.
Lighting Techniques in Low Visibility Environments
Light behaves differently underwater, and this effect intensifies with depth. As you dive deeper, natural sunlight diminishes quickly, and colors like red and orange are absorbed first, leaving behind blues and greens. Technical diving often takes place in low visibility or turbid waters, making effective artificial lighting indispensable to bring back vivid colors in your photos.
Using powerful strobes or continuous video lights positioned off-camera helps eliminate backscatter—those distracting particles illuminated when using on-camera flash. Proper strobe positioning, typically at a 45-degree angle from the subject, reduces reflection and enhances texture and color. In extremely dark environments like caves or deep wrecks, having multiple lights can be helpful to avoid harsh shadows and fully illuminate larger scenes.
Managing your light intensity and angle requires careful experimentation. Too much light can overexpose parts of your image, while too little results in dull photos. Learning to balance ambient and artificial lighting will greatly improve your image quality and artistic expression.
Composition Tips Specific to Underwater Scenes
Composing compelling underwater photographs differs in many ways from terrestrial photography. Water introduces unique elements like distortion, floating particles, and a three-dimensional playing field with approaching fauna and flora.
To create captivating images:
- Get Close: Water reduces clarity and color, so minimize the distance between your lens and the subject. This improves sharpness and color saturation.
- Use the Rule of Thirds: Placing subjects off-center creates balanced and engaging compositions. Imagine a grid and position key elements along those lines or intersections.
- Incorporate Scale: Including familiar objects, such as divers or recognizable marine life, can help convey the vastness or intimacy of underwater scenes.
- Be Mindful of Backgrounds: A cluttered backdrop can detract attention; try angling your shot against open water, sand, or interesting textures like coral formations.
- Capture Movement: Including bubbles, fish in motion, or the diver’s fin movement adds dynamism to photos and tells a story.
Understanding your environment and anticipating wildlife behavior increases your chance of framing extraordinary moments in the underwater world.
Managing Buoyancy for Steady Shots
One of the most critical yet often overlooked aspects of underwater photography for technical divers is buoyancy control. Maintaining neutral buoyancy is essential for steady shooting, preventing camera shake, and avoiding unwanted disturbance to the marine environment.
Achieving this takes practice and attention to your breathing, positioning, and movement planning. Here are some tips:
- Perfect Your Trim: Adjust your gear and body position to achieve a horizontal, streamlined posture. This facilitates easier movement and better control.
- Use Slow, Controlled Breaths: Breathing patterns directly impact buoyancy, so remaining calm and deliberate underwater helps stabilize your shots.
- Minimize Movement: Avoid rapid or jerky motions when photographing subjects. A steady hand and deliberate framing yield sharp images.
- Use a Stable Surface: If possible, position yourself on the seafloor or a rock gently to anchor yourself, but always be cautious not to damage sensitive habitats.
By mastering buoyancy techniques, you’ll not only produce crisp photos but also minimize your impact on fragile ecosystems.
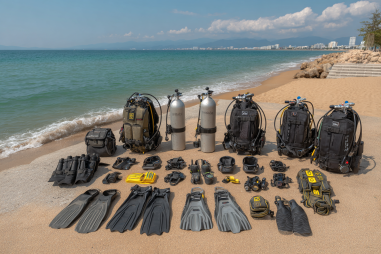
Protecting Camera Gear in Technical Dives
Technical dives often involve challenging environments that can subject your camera equipment to hazards such as strong currents, sharp rocks, silt, and cold temperatures. Taking care to protect your gear ensures longevity and performance.
Some essential protective measures include:
- Use Lens Ports and Domes: Specialized ports protect lenses from scratches and water entry while maintaining optical clarity.
- Secure Your Setup: Attach lanyards, tethers, or arms to prevent losing expensive camera pieces during complex maneuvers or in surge conditions.
- Regular Seal Checks: Conduct leak tests before each dive and rinse housings thoroughly with fresh water afterward to remove salt and sediment.
- Temperature Considerations: In cold water, condensation can be a problem inside housings. Use silica gel packs or anti-fog inserts to control moisture.
- Carry Backup Equipment: Extra batteries, memory cards, and lighting can save the day if primary gear fails during a dive.
Proper handling and preventive maintenance reduce risks and keep your photographic tools ready for every adventure.
Post-Dive Photo Processing Advice
Editing your underwater photos is a vital step in bringing out the best in your images. Raw shots often appear flat or blueish due to color absorption underwater, so a bit of post-processing helps restore vibrancy and detail.
Some editing tips tailored for underwater photography:
- White Balance Correction: Adjust white balance to compensate for blue or green color casts and bring back natural hues.
- Contrast and Exposure: Enhance contrast and fine-tune exposure for better depth and dimensionality.
- Noise Reduction: Low-light conditions often require higher ISO, which can introduce grain. Use noise reduction tools carefully to maintain sharpness.
- Highlight and Shadow Adjustment: Recover details in overexposed or underexposed areas while keeping the image balanced.
- Crop and Straighten: Refine composition by cropping out distractions and leveling horizons.
Software such as Adobe Lightroom, Photoshop, or dedicated underwater editing apps provides powerful tools to enhance your underwater artistry.
Elevate Your Dive Experience Through Photography
Advanced technical scuba diving photography is both a technical challenge and a creative pursuit. By carefully selecting and protecting your equipment, mastering lighting and composition strategies, managing buoyancy, and skillfully processing your images, you unlock the ability to share the incredible underwater world in vivid detail.
Each dive not only becomes an exploration of unknown depths but also an opportunity to capture unique moments that inspire and educate others. Embrace the learning curve, practice continuously, and remember that patience and respect for the environment will always lead to the most rewarding photographic results beneath the surface.